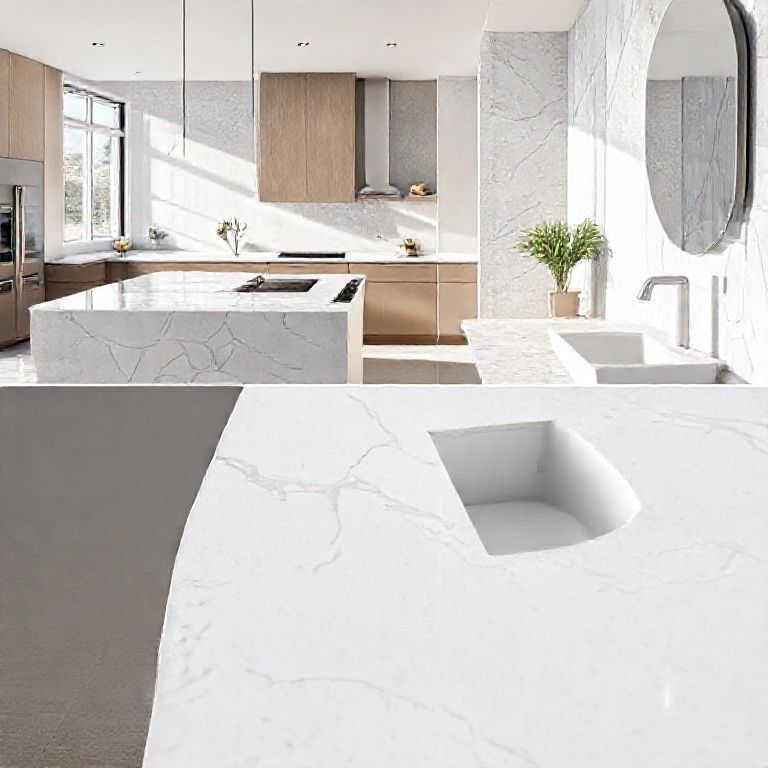
${part1} Discover the comprehensive guide to repairing cracks in artificial stone countertops with our extensive video collection. Artificial stone countertops are known for their durability, aesthetic appeal, and low maintenance, but even these can develop cracks over time due to wear and tear or accidental impacts. Worry not! With our expertly crafted video tutorials, you will learn step-by-step techniques to effectively repair those unsightly cracks and restore your countertop to its original pristine condition.
Why Repair Artificial Stone Countertops?
Artificial stone countertops are a popular choice in kitchens and bathrooms due to their resistance to stains, scratches, and chips. However, accidents happen, and cracks can still occur. Addressing these cracks promptly is crucial for maintaining the integrity and appearance of your countertops. Here’s why repairing them is essential:
Preservation of Aesthetics: A crack in a countertop can significantly detract from the visual appeal of your kitchen or bathroom. Repairing it ensures that your space looks clean and modern. Preventing Further Damage: Ignoring cracks can lead to more significant damage over time. Prompt repair prevents the crack from spreading and causing further issues. Cost-Effective: Repairing a crack is far more economical than replacing the entire countertop, especially given the cost of artificial stone materials.
Tools and Materials Needed
Before diving into the repair process, it’s important to gather the necessary tools and materials. Here’s a list of what you’ll need:
Epoxy Resin: A high-quality, flexible epoxy resin designed for stone repair. Mixing Container: A non-reactive container for mixing the epoxy. Mixing Tools: Spatulas and sticks for thoroughly mixing the epoxy. Sandpaper: Medium-grit sandpaper for preparing the cracked area. Cloth: Soft cloths for cleaning and wiping surfaces. Masking Tape: To protect adjacent areas from epoxy splatters. Protective Gear: Gloves and safety goggles to protect yourself during the repair process.
Step-by-Step Repair Process
Step 1: Preparation
Clean the Area: Begin by thoroughly cleaning the cracked area with a damp cloth to remove any dirt, grease, or debris. Ensure the area is completely dry before proceeding. Prepare the Crack: Using medium-grit sandpaper, lightly sand the edges of the crack to roughen the surfaces. This will help the epoxy adhere better. Mask Off: Apply masking tape around the crack to protect any adjacent surfaces from epoxy splatters.
Step 2: Mixing the Epoxy Resin
Measure the Epoxy: Follow the manufacturer’s instructions to measure the resin and hardener. Typically, you’ll need a 2:1 ratio of resin to hardener. Mix Thoroughly: Use the mixing tools to thoroughly combine the resin and hardener in the container until you achieve a uniform consistency.
Step 3: Applying the Epoxy
Inject the Epoxy: Using a syringe or a dropper, carefully inject the epoxy resin into the crack. Fill the crack completely and avoid overfilling. Smooth the Surface: Use a clean cloth or a stick to smooth the epoxy on the surface, ensuring it flows evenly into the crack and eliminates air bubbles.
Step 4: Curing
Allow to Cure: Let the epoxy cure as per the manufacturer’s instructions. This usually involves leaving it undisturbed for several hours or overnight. Clean Up: Once cured, remove the masking tape and clean the surface with a damp cloth to remove any epoxy residue.
Common Mistakes to Avoid
Even with the best techniques, certain mistakes can occur, leading to an ineffective repair:
Inadequate Cleaning: Failing to clean the cracked area thoroughly can result in poor epoxy adhesion. Wrong Epoxy Ratio: Using the incorrect ratio of epoxy resin and hardener can lead to weak repairs. Insufficient Curing Time: Not allowing sufficient curing time can result in an incomplete repair, leading to further cracking.
Expert Tips for Successful Repairs
Patience is Key: Take your time with each step to ensure a high-quality repair. Use Quality Materials: Always opt for high-quality epoxy resin for the best results. Practice Makes Perfect: If you’re new to this, practice on a small, inconspicuous area first to get the hang of the process.
By following these guidelines and utilizing our extensive video collection, you’ll be well-equipped to tackle any crack in your artificial stone countertops with confidence and skill.
${part2}
Continuing our comprehensive guide to repairing cracks in artificial stone countertops, we delve deeper into expert techniques and provide detailed demonstrations in our extensive video collection. Whether you’re a DIY enthusiast or a professional looking to refine your skills, our videos are designed to equip you with the knowledge and confidence needed to tackle any crack with precision.
Advanced Repair Techniques
For those looking to elevate their repair skills, our videos cover advanced techniques that ensure a seamless repair job. Here are some advanced methods you’ll find in our collection:
Color Matching: Ensuring the epoxy matches the color of your countertop for a flawless finish. High-Pressure Filling: Techniques for filling deep cracks with minimal surface disturbance. Layered Repairs: Step-by-step guides on repairing multiple cracks in a cohesive manner.
Detailed Demonstrations
Our videos offer detailed demonstrations of each repair step, from preparation to finishing touches. Here’s what you can expect:
Preparation: Each video begins with a thorough preparation phase, showing you how to clean, sand, and protect the area around the crack. Epoxy Application: Watch as experts demonstrate precise epoxy application, highlighting the importance of technique and accuracy. Curing and Finishing: Learn how to properly cure the epoxy and finish the surface to ensure a durable and aesthetically pleasing repair.
Real-Life Repair Scenarios
To provide practical insights, our video collection includes real-life repair scenarios. These include:
Kitchen Countertop Repairs: Watch as we repair cracks in kitchen countertops that have endured years of use and abuse. Bathroom Countertop Fixes: See how to handle more delicate repairs in bathroom settings, where moisture can be a factor. High-Traffic Area Repairs: Learn how to tackle cracks in high-traffic areas that require robust repairs to withstand daily use.
Expert Tips and Tricks
Our experts share valuable tips and tricks that can make your repair process smoother and more effective:
Using a Syringe for Precision: Learn how to use a syringe for precise epoxy application, ensuring no waste and perfect filling of cracks. Temperature Considerations: Understand the importance of room temperature when curing epoxy and how to adjust your process accordingly. Preventative Maintenance: Tips on how to maintain your countertops to prevent future cracks and extend their lifespan.
Common Challenges and Solutions
Our videos address common challenges faced during repairs and provide effective solutions:
Epoxy Bubbles: Techniques to eliminate epoxy bubbles for a smooth finish. Crack Spreading: Methods to prevent the crack from spreading while repairing. Color Discrepancies: How to ensure the epoxy matches the countertop color perfectly.
Enhancing Your DIY Skills
To help you become more proficient in countertop repairs, our collection includes tutorials designed for different skill levels:
Beginner Guides: Step-by-step repairs for those new to DIY repair work. Intermediate Techniques: More complex repairs that build on basic skills. Advanced Projects: Challenging repairs that push your skills to the limit.
How to Choose the Right Epoxy
Selecting the right epoxy is crucial for a successful repair. Our videos guide you through:
Types of Epoxies: Differences between various epoxy resins and which to use for different types of cracks. Brand Recommendations: Expert opinions on the best epoxy brands for durability and ease of use. Application Scenarios: When to use a specific type of epoxy for optimal results.
Customer Testimonials
Don’t just take our word for it; hear from our satisfied customers who have successfully repaired their countertops using our video tutorials:
“The videos were incredibly detailed and easy to follow. My first attempt at repairing a crack was a success!” – Sarah, Kitchen Enthusiast “I was skeptical at first, but these videos have really improved my DIY skills. My bathroom countertop looks brand new!” – Mike, Home Improvement Enthusiast
By继续我们之前的对话,我们可以深入探讨一些更具体的技巧和方法,帮助您更好地修复人造石台面上的裂缝。这些技巧不仅适用于家庭DIY,还能为专业人士提供一些参考意见。
详细步骤和技巧
1. 准备工作
在开始修复之前,准备好所有需要的工具和材料非常重要。确保工作区域清洁、通风良好,并且有充足的光线。
2. 选择合适的修复材料
高强度的环氧树脂:通常用于修复人造石台面,因其强度和耐久性较高。 填充剂:如果裂缝较大,可能需要填充剂来填补空隙。 清漆:在修复完成后,用清漆保护修复的区域,以增加耐用性和美观性。
3. 清洁和准备裂缝区域
使用中等粒度的砂纸轻轻打磨裂缝边缘,以确保修复材料能够牢固地粘附在台面上。然后用清洁剂彻底清洁裂缝区域,确保没有油脂、灰尘或其他杂质。
4. 应用修复材料
混合环氧树脂:按照说明书的比例混合环氧树脂和固化剂。通常需要在一个干净的容器中充分搅拌,直至混合均匀。 填充裂缝:使用注射器或小滴管将混合好的环氧树脂注入裂缝中。如果裂缝较深,可能需要多次注入。 表面处理:用干净的布将多余的环氧树脂擦拭干净,确保修复面的平整。
5. 固化和修整
按照产品说明书中的时间要求,让修复材料自然固化。在固化过程中,避免在修复区域施加任何压力或重量。
6. 打磨和上漆
打磨:固化后,使用细砂纸轻轻打磨修复区域,使其与台面其他部分平整一致。 清漆:用透明或半透明的清漆保护修复区域,增加耐用性和美观度。通常需要多层清漆,每层之间需要轻轻打磨。
专业技巧和建议
1. 颜色匹配
采用专业颜色调和剂:如果修复材料不能完全匹配台面颜色,可以使用专业颜色调和剂进行调配。 小样测试:在大面积修复前,先在不显眼的地方进行小样测试,确保颜色匹配。
2. 处理复杂裂缝
对于复杂或多个裂缝,可以采用以下方法:
分阶段修复:将多个裂缝分阶段修复,确保每个裂缝都得到充分修复。 多层修复材料:有时需要多层修复材料来填补较大的裂缝,每层固化后再继续。
3. 定期维护
即使经过修复,人造石台面仍需要定期维护。使用适当的清洁剂和护理产品,可以延长台面的使用寿命。
总结
修复人造石台面上的裂缝,虽然看似复杂,但通过正确的方法和工具,任何人都能完成这项任务。关键在于准备充分、操作细致,以及选择合适的修复材料。通过我们的详细指南和专业技巧,您将能够修复台面上的任何裂缝,使其恢复如新。
如果您有任何其他问题或需要更多具体的建议,欢迎随时提问!