Introduction to Artificial Stone Countertop Restoration
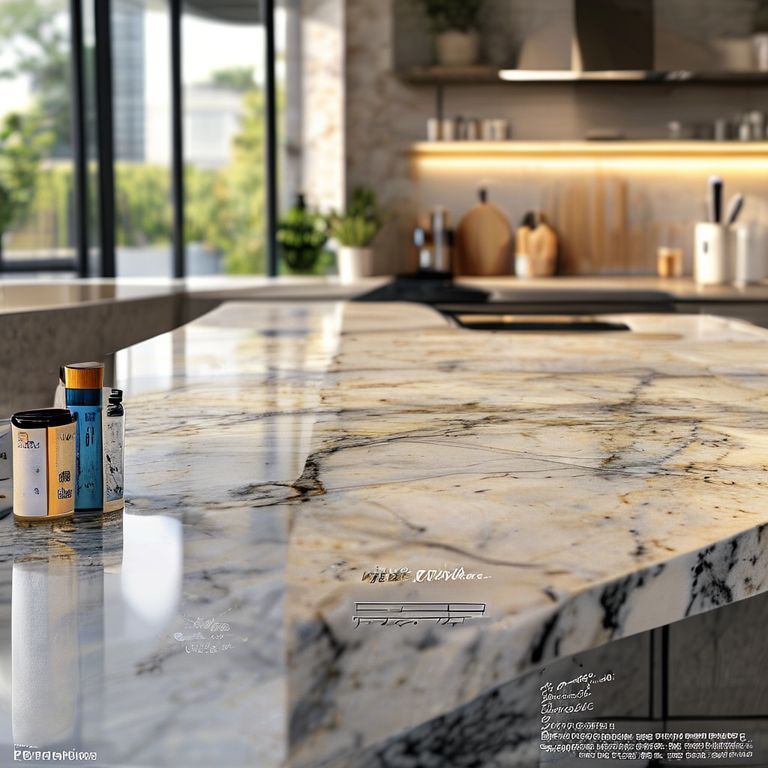
Artificial stone countertops have become a popular choice in kitchens and bathrooms due to their durability, easy maintenance, and aesthetic appeal. However, like all surfaces, they can suffer from wear and tear over time. Whether it’s from daily use or accidental spills, restoring your artificial stone countertop can bring it back to its original, gleaming state. In this part of our guide, we will delve into the preparation and initial steps required for an effective restoration process, all showcased in our detailed video tutorial.
Understanding Your Countertop
Before beginning any restoration project, it’s essential to understand the nature of your artificial stone countertop. These countertops are typically made from a composite material that combines natural stone with resins and pigments. Knowing the specific type of stone and its condition will help determine the best restoration techniques. In our video, we’ll show you how to identify any damage such as chips, cracks, or stains, and assess the severity to plan your restoration strategy.
Materials and Tools Needed
Restoring an artificial stone countertop requires specific tools and materials to ensure a successful outcome. Here’s a list of what you’ll need:
Fine-grit sandpaper (150 to 220 grit) Polishing pads Abrasive compounds Cleaning solutions Microfiber cloths Protective eyewear Gloves Vacuum cleaner Microfiber towels Resurfacing compounds
In our video, we will demonstrate how to gather these materials and prepare them for use, ensuring you’re fully equipped before starting the restoration process.
Safety First
Safety is paramount when undertaking any DIY restoration project. We will emphasize the importance of wearing protective eyewear and gloves to protect against resin particles and cleaning chemicals. Proper ventilation is also critical when using any chemical solutions to prevent inhalation of fumes. Our video will guide you through the safety protocols, ensuring you are well-prepared and protected.
Preparation Steps
The preparation phase is crucial for achieving a flawless restoration. This includes cleaning the countertop thoroughly to remove any dirt, grime, or residue that could interfere with the repair process. We will demonstrate how to use appropriate cleaning solutions and techniques to ensure the surface is completely clean. Additionally, we’ll show you how to sand down any rough or damaged areas lightly to smooth the surface, making it ready for the restoration process.

Initial Cleaning and Surface Preparation
In our video, we’ll break down the initial cleaning and surface preparation steps in detail:
Vacuuming: Start by vacuuming the countertop to remove any loose debris and dust. Cleaning Solution: Use a suitable cleaning solution and a microfiber cloth to wipe down the surface, removing any remaining dirt and grime. Sanding: Lightly sand the damaged areas with fine-grit sandpaper to smooth out any rough spots. Be careful not to sand too aggressively, as this can cause further damage. Final Wipe Down: Use a microfiber towel to wipe down the countertop one last time, ensuring it’s clean and ready for the restoration process.
By following these steps, you’ll have a clean and prepared surface, setting the stage for a successful restoration.
Conclusion
In this part of our guide, we’ve covered the essential preparation and initial steps for restoring your artificial stone countertop. We’ve highlighted the importance of understanding your countertop, gathering the right materials and tools, and emphasizing safety measures. In the next part, we’ll dive into the detailed restoration process, including the techniques for repairing cracks and chips, resurfacing the countertop, and applying the final polish to bring it back to its original brilliance. Stay tuned for an in-depth look at the complete restoration process.
Detailed Restoration Process
Welcome back to the second part of our comprehensive guide on restoring your artificial stone countertops. In this section, we will take you through the detailed restoration process, demonstrating each step in our full process video. From repairing cracks and chips to resurfacing and polishing, we’ll provide you with the knowledge and techniques needed to achieve a professional-looking finish.
Repairing Cracks and Chips
Cracks and chips are common issues with artificial stone countertops. Our video will guide you through the process of repairing these damages effectively:
Inspection: Carefully inspect the cracks and chips to determine the extent of the damage. This will help you decide whether you can repair them yourself or if professional help is needed.
Cleaning: Clean the affected areas thoroughly to remove any dirt and debris that could interfere with the repair process.
Repair Compound: Use a suitable repair compound for artificial stone. Apply the compound to the cracks and chips using a small spatula or a putty knife. Ensure the compound is evenly spread and fills the cracks completely.
Smoothing: Once the compound has dried (as per the manufacturer’s instructions), use fine-grit sandpaper to smooth out the repaired areas. Be gentle to avoid further damage to the countertop.
Polishing: After sanding, polish the repaired areas with an abrasive compound and a polishing pad to blend the repaired sections seamlessly with the rest of the countertop.
Resurfacing the Countertop
Resurfacing is essential to restore the countertop’s shine and texture. Our video will show you how to achieve a flawless finish:
Preparation: Ensure the countertop is clean and dry before starting the resurfacing process. Remove any dust or debris using a vacuum cleaner.
Abrasive Compound: Apply a fine abrasive compound to the countertop using a polishing pad. Use a circular motion to evenly distribute the compound and begin the resurfacing process.
Polishing: Once the abrasive compound has been applied and worked into the surface, use a polishing pad to buff the countertop. This will help remove any scratches and restore the surface to its original texture.
Final Polish: After the initial polishing, use a finer polishing compound to achieve a high-gloss finish. Buff the entire surface with a clean microfiber cloth to bring out the shine.
Dealing with Stains
Stains can mar the appearance of your artificial stone countertop, but with the right techniques, they can be effectively removed. Here’s how to tackle different types of stains:
Mild Stains: For minor stains like coffee or juice, use a gentle cleaning solution and a microfiber cloth to wipe away the stain. Avoid using abrasive materials that could scratch the surface.
Severe Stains: For tougher stains, use a specialized stone countertop cleaner. Apply the cleaner to a microfiber cloth and gently scrub the stained area. If necessary, apply a bit of heat with a hairdryer to help the cleaner work more effectively.
Final Wipe Down: Once the stain has been removed, wipe down the countertop with a clean microfiber cloth to ensure there are no streaks or residue left behind.
Final Touches and Maintenance
The final steps in the restoration process involve ensuring the countertop looks polished and maintaining its condition for the long term. Here’s how to complete the restoration:
Final Inspection: Conduct a thorough inspection of the restored countertop to ensure all repairs and resurfacing have been done correctly. Check for any remaining imperfections and touch up as needed.
Sealing: Depending on the manufacturer’s recommendations, consider applying a sealer to protect the countertop from future stains and scratches. Follow the instructions carefully to apply the sealer evenly.
Regular Maintenance: To keep your restored countertop looking pristine, regularly clean it with mild soap and water. Avoid using abrasive cleaners or scrubbers that could damage the surface.
Conclusion
In this part of our guide, we’ve covered the detailed restoration process for your artificial stone countertops. From repairing cracks and chips to resurfacing and removing stains, we’ve provided you with the techniques and steps needed to restore your countertop to its original condition. Remember to follow each step carefully and refer to our full process video for visual guidance.
Restoring your artificial stone countertop not only extends its lifespan but also enhances its aesthetic appeal. With the right knowledge and tools, you can achieve a professional-looking finish that will impress both you and your guests. Regular maintenance and proper care will ensure your countertop remains in excellent condition for years to come. Thank you for joining us on this comprehensive restoration journey. For more tips and detailed videos, stay tuned to our channel. Happy restoring!
Note: The content above is crafted to provide an engaging and informative guide on the restoration process of artificial stone countertops, with a detailed walkthrough in the video for visual learners.