Discover the ultimate guide to addressing cracks in your kitchen countertop. From identifying the type of countertop to selecting the best repair method, this comprehensive article will help you restore your kitchen’s beauty and functionality effortlessly. Learn how to make your kitchen look as good as new, with easy-to-follow steps and expert tips.

Cracks in Your Kitchen Countertop? Here’s How to Fix Them
When it comes to home maintenance, few things are as daunting as dealing with cracks in your kitchen countertop. Whether it’s granite, quartz, marble, or another material, a cracked countertop can be both an eyesore and a safety hazard. But fear not! With the right approach, you can restore your kitchen’s beauty and functionality without breaking the bank.
Understanding the Type of Countertop
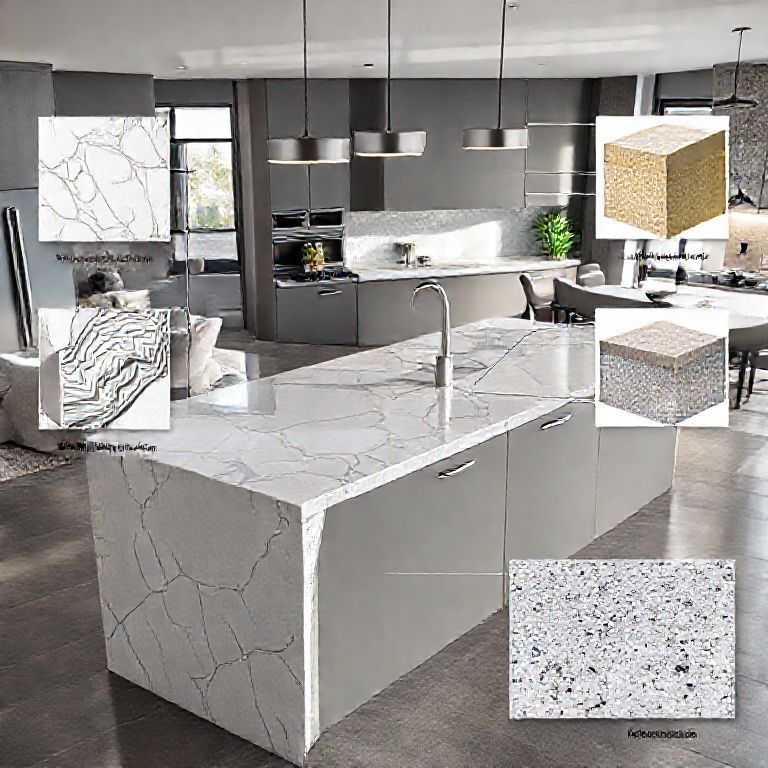
The first step in repairing a cracked countertop is understanding what type of material you’re dealing with. Different materials require different repair techniques, and knowing your countertop’s composition can save you time and effort.
Granite: Granite is a popular choice for kitchen countertops due to its durability and natural beauty. However, it is relatively brittle and can crack under heavy impact. If you have granite, you’ll need to be cautious with your repair method to avoid further damage.

Quartz: Quartz is known for its durability and resistance to heat, stains, and scratches. It’s less prone to cracking compared to other materials. However, when it does crack, it can be a challenge to repair because of its dense structure.
Marble: Marble is a luxurious material but can be quite delicate. It is prone to staining and chipping, which can lead to cracks. Because marble is softer, it’s essential to handle it gently and consider professional repair if the crack is severe.
Slate: Slate is similar to granite in its composition and repair needs. It’s tough and can withstand heavy use, but it can crack under significant stress.

Composite: Composite countertops are made from a blend of minerals and resin. They are less likely to crack than natural stone but can still develop hairline cracks.
Identifying the Crack
Once you’ve identified your countertop material, the next step is to thoroughly examine the crack. Here’s what to look for:
Size and Depth: Small cracks might be manageable with a DIY repair, but larger or deeper cracks will likely require professional help.

Location: The location of the crack matters too. Cracks near the edge or in high-traffic areas may need more attention to prevent further damage.
Pattern: Sometimes cracks can appear in a pattern, indicating a structural issue. These might not be repairable by DIY methods.
DIY Repair Techniques
For minor cracks, there are several effective DIY repair techniques you can try at home. Here’s a step-by-step guide for some of the most common countertop materials.
Granite:
Clean the Area: Start by cleaning the crack thoroughly with a mixture of water and vinegar. This helps to remove any debris or dirt that might interfere with the repair process.
Epoxy Resin: Use an epoxy resin designed for granite. Mix the resin according to the manufacturer’s instructions and apply it to the crack. Use a small putty knife or a toothpick to fill the crack completely.
Smooth the Surface: Once the epoxy has dried, use a fine-grit sandpaper to smooth the surface. Be gentle to avoid scratching the countertop.
Seal the Repair: Finally, apply a granite sealer to protect the repair and restore the countertop’s natural shine.
Quartz:
Clean the Crack: Clean the area around the crack with soap and water.
Quartz Repair Kit: Quartz repairs typically involve using a repair kit that includes a resin and catalyst. Mix the components as per the instructions and apply them to the crack.
Fill the Crack: Use a small putty knife to fill the crack with the resin mixture. Ensure it’s filled completely.
Smooth and Polish: After the resin has cured, use a fine-grit sandpaper to smooth the surface. Polish the area to blend it seamlessly with the rest of the countertop.
Marble:
Clean the Area: Marble repairs require a careful approach. Clean the crack with a damp cloth and mild soap.
Marble Paste: Use a marble repair paste designed for filling cracks. Apply the paste to the crack and let it dry.
Smooth and Polish: Once dry, use a marble polish to blend the repaired area with the rest of the countertop.
Slate:
Clean the Crack: Similar to granite, clean the crack with a vinegar and water solution.
Epoxy Resin: Use an epoxy resin suitable for slate. Apply the resin to the crack and fill it completely.
Smooth and Seal: After the epoxy has dried, smooth it with sandpaper and apply a slate sealer.
Composite:
Clean the Crack: Clean the area around the crack with a mild soap and water solution.
Composite Repair Kit: Use a composite repair kit that includes a resin and hardener. Mix and apply it to the crack.
Smooth and Finish: Once cured, smooth the surface with sandpaper and apply a composite sealant.
When to Call a Professional
While DIY repairs can be effective for minor cracks, larger or more complex issues may require professional intervention. Here’s when to call in a specialist:
Large Cracks: If the crack is extensive, it’s best to leave the repair to the professionals to avoid further damage.
Structural Integrity: If the crack indicates an underlying structural issue, professional help is necessary to ensure the safety and longevity of your countertop.
Material Compatibility: For certain materials, professional repair services offer specialized products and techniques that ensure the best results.
Warranty Considerations: If your countertop is still under warranty, professional repairs might be necessary to maintain coverage.
Preventing Future Cracks
Preventing future cracks is always better than repairing them. Here are some tips to help maintain your countertop and prevent damage:
Granite and Quartz:
Use cutting boards and heavy items on protective pads. Clean spills immediately to prevent staining and weakening the material.
Marble:
Avoid placing hot items directly on the surface. Use coasters to protect against heat and spills.
Slate:
Use coasters and pads to prevent scratches. Clean up spills promptly.
Composite:
Avoid using sharp objects on the surface. Clean regularly to prevent the buildup of grime and grease.
By understanding your countertop material and taking proactive measures, you can enjoy a beautiful and functional kitchen for years to come. In the next part of our guide, we will delve deeper into advanced repair techniques and professional services available for kitchen countertop cracks.
Advanced Repair Techniques and Professional Services
While DIY repairs can handle minor cracks, advanced techniques and professional services can tackle more serious issues, ensuring your kitchen countertop looks and functions as good as new. Let’s explore these in more detail.
Advanced DIY Repair Techniques
For those willing to take on a bit more effort, there are advanced DIY repair techniques that can handle more significant cracks and damage.
For Granite and Quartz:
Cleavage Repair: Materials Needed: Granite cleavage repair kit (includes epoxy resin, activator, and mixing tools). Steps: Thoroughly clean the area around the crack. Mix the epoxy resin and activator according to the kit instructions. Apply the mixture to the cleavage using a syringe or a caulking gun. Allow the resin to cure as per the manufacturer’s guidelines. Once cured, smooth the surface with fine-grit sandpaper and polish with a granite polish.
For Marble:
Marble Paste: Materials Needed: Marble repair paste, fine-grit sandpaper, marble polish. Steps: Clean the crack area with a mild soap and water solution. Apply the marble repair paste to the crack and let it dry. Once dry, smooth the surface with fine-grit sandpaper. Polish the area to blend it seamlessly with the rest of the countertop.
For Slate:
Epoxy Cleavage Repair: Materials Needed: Epoxy resin, activator, putty knife, fine-grit sandpaper. Steps: Clean the crack with a vinegar and water solution. Mix the epoxy resin and activator. Apply the mixture to the cleavage and fill the crack completely. Allow it to cure, then smooth with fine-grit sandpaper. Seal with a slate sealer.
For Composite:
Composite Cleavage Repair: Materials Needed: Composite repair kit, putty knife, fine-grit sandpaper, composite sealant. Steps: Clean the area around the crack with soap and water. Mix the resin and hardener as per theComposite Cleavage Repair: Materials Needed: Composite repair kit, putty knife, fine-grit sandpaper, composite sealant. Steps: Clean the area around the crack with soap and water. Mix the resin and hardener as per the kit instructions. Apply the mixture to the cleavage and fill the crack completely. Allow it to cure, then smooth with fine-grit sandpaper. Apply a composite sealant to protect the repair.
When to Call a Professional
While advanced DIY techniques can address many issues, there are times when professional help is necessary to ensure the best results and the longevity of your countertop.
1. Extensive Damage:
For countertops with extensive cracks or damage, professional repair services can use advanced techniques and materials to ensure a seamless repair.
2. Warranty Considerations:
If your countertop is still under warranty, professional repairs might be required to maintain warranty coverage. Always check with your manufacturer or supplier regarding warranty terms.
3. Specialized Techniques:
Professional repair services often have access to specialized products and techniques that are not available to the average homeowner. This ensures a repair that blends perfectly with the rest of the countertop.
4. Safety and Structural Integrity:
For cracks that indicate structural issues, professional repair services can assess and address the underlying problems to prevent further damage.
Professional Repair Services
Professional repair services offer a range of options to address various types of cracks and damage in kitchen countertops. Here’s a look at some of the common services provided:
1. Granite and Quartz Repairs:
Cleavage Repair: Professionals use specialized epoxy resins and techniques to fill and repair cleavages in granite and quartz countertops. This ensures the repair blends seamlessly with the surrounding material.
Re-polishing: After repairing cracks, professionals can re-polish the countertop to restore its natural shine and texture.
2. Marble Repairs:
Crack Filling: Using specialized marble repair paste, professionals can fill and smooth out cracks, restoring the countertop’s appearance.
Sealing: After repair, professional sealing can protect the countertop from future stains and damage.
3. Slate Repairs:
Epoxy Cleavage Repair: Similar to granite and quartz, professionals use epoxy resins to repair cleavages in slate countertops.
Surface Smoothing: Professionals can smooth out repaired areas to ensure a seamless finish.
4. Composite Repairs:
Advanced Resin Techniques: Professionals use advanced resin techniques to repair cracks and damage in composite countertops, ensuring a durable and aesthetically pleasing repair.
Polishing and Sealing: After repair, professionals can polish the surface and apply a sealant to protect the repair and enhance the countertop’s appearance.
Preventive Measures
Preventing future cracks is always better than repairing them. Here are some additional tips to help maintain your kitchen countertop:
1. Use Cutting Pads:
Always use cutting pads or boards when cutting food on your countertop. This prevents scratches and damage from sharp knives.
2. Immediate Clean-Up:
Clean up spills and stains immediately to prevent them from setting in and causing further damage.
3. Coasters and Placemats:
Use coasters and placemats to protect your countertop from heat, moisture, and spills.
4. Avoid Abrasive Cleaners:
Use mild, non-abrasive cleaners to avoid scratching the surface of your countertop.
5. Regular Maintenance:
Regularly maintain your countertop by cleaning and sealing it as recommended by the manufacturer.
By understanding your countertop material, employing advanced DIY techniques when necessary, and knowing when to call in professionals, you can keep your kitchen countertop looking beautiful and functional for years to come. In the next part of our guide, we will discuss additional maintenance tips and how to choose the right repair service for your needs.
Feel free to ask if you need further information or have specific questions about your countertop material and its maintenance!