DIY Guide to Repairing Cracks in Your Artificial Stone Countertop: Expert Tips & Step-by-Step Tutorial
Artificial stone countertops are a popular choice for modern kitchens and bathrooms due to their durability, aesthetic appeal, and low maintenance. However, like all materials, they are not immune to damage. Cracks in an artificial stone countertop can be unsightly and may compromise the integrity of your surface. Fortunately, with the right tools and a bit of know-how, you can repair these cracks yourself. In this comprehensive guide, we will walk you through the entire process, from identifying the crack to applying the final touch-ups.
Understanding the Nature of Artificial Stone Countertops
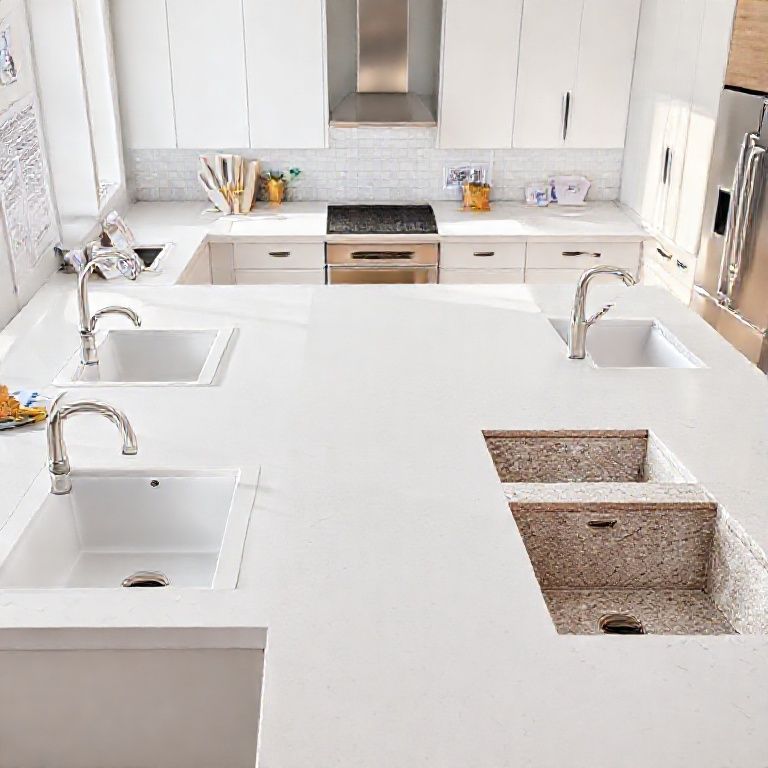
Before diving into the repair process, it’s essential to understand what artificial stone is and why it can crack. Artificial stone, often composed of materials like quartz or resin-based composites, is designed to mimic natural stone. It’s created through a process that involves mixing and compressing various materials under high pressure. While this makes it very durable, it can still crack under extreme stress, such as heavy objects or sharp impacts.
Step-by-Step Repair Process
Step 1: Gather Your Materials
To repair cracks in your artificial stone countertop, you’ll need the following materials:
Fine-grit sandpaper (220-400 grit) Artificial stone repair kit (matching color) Putty knife Mixing stick Plastic scraper Clean cloth Water Safety goggles Protective gloves
Step 2: Prepare the Crack
Begin by thoroughly cleaning the area around the crack with a clean cloth dampened with water. This will remove any dirt, debris, or dust that could interfere with the repair process. Next, use fine-grit sandpaper to gently smooth out the edges of the crack. This step is crucial as it helps the repair material adhere better to the existing surface.
Step 3: Apply the Repair Compound
Most artificial stone repair kits come with a putty compound that matches the color of your countertop. Using a putty knife or plastic scraper, apply a small amount of the repair compound into the crack. Work the compound into the crack using the scraper, making sure to fill it completely. For larger cracks, you may need to apply multiple layers, allowing each layer to dry before adding the next.
Step 4: Smooth the Surface
Once the repair compound is dry (usually as per the instructions on the repair kit), use the fine-grit sandpaper to smooth the surface. This step will ensure that the repaired area blends seamlessly with the rest of your countertop.

Step 5: Final Touch-Ups
For any minor imperfections or to ensure a flawless finish, you can use a fine polish or a matching sealant. This will not only enhance the appearance but also add an extra layer of protection to the repaired area.
Expert Tips for Successful Repairs
Color Matching: Ensure the repair compound matches the color of your countertop precisely. Any visible mismatch can detract from the repair’s effectiveness. Patience: Allow adequate drying time between each layer of the repair compound. Rushing this process can lead to an uneven repair. Proper Ventilation: When working with any repair compounds, ensure the area is well-ventilated to avoid inhaling fumes.
DIY Guide to Repairing Cracks in Your Artificial Stone Countertop: Expert Tips & Step-by-Step Tutorial
In the previous part of our guide, we covered the basics of understanding artificial stone countertops and the initial steps to repair cracks. Now, let’s delve deeper into the process with more detailed instructions and advanced tips to ensure a professional-looking repair.
Advanced Preparation Techniques
Step 1: Detailed Cleaning
While a simple clean with water is a good start, for a more thorough preparation, use a cleaner specifically designed for artificial stone. This will remove any stubborn residues or oils that might interfere with the repair compound’s adhesion. After cleaning, rinse the area with water and let it dry completely.
Step 2: Edge Preparation
To achieve a seamless repair, it’s vital to prepare the edges of the crack properly. Use the fine-grit sandpaper to create a clean, straight edge. This technique ensures the repair compound can fill the crack completely and bond well with the existing surface.
Applying the Repair Compound
Step 1: Mixing the Compound
Most repair kits come with a two-part compound that needs to be mixed. Follow the manufacturer’s instructions for the correct ratio. Typically, you’ll need to mix the two parts thoroughly using a mixing stick until you achieve a uniform consistency. The color of the mixture should match the countertop precisely.
Step 2: Filling the Crack
Using a putty knife or plastic scraper, fill the crack completely with the mixed compound. Apply it in thin layers, ensuring each layer is fully cured before adding the next. This method prevents the compound from cracking and allows for a smoother finish.
Step 3: Ensuring Even Distribution
Press the compound into the crack gently but firmly. Avoid over-filling as it can result in excess material bulging out. Use the scraper to smooth the surface of the compound once it’s applied.
Achieving a Flawless Finish
Step 1: Sanding
Once the compound has cured completely (as per the kit instructions), use the fine-grit sandpaper to smooth the repaired area. This step is crucial for blending the repaired section with the rest of the countertop. Sand gently and progressively move to a finer grit if needed.
Step 2: Polishing
To give your repair a professional finish, use a polishing compound designed for artificial stone. Apply it to a clean cloth and gently rub the repaired area in circular motions. This step will polish the surface, giving it a uniform, shiny appearance.
Step 3: Sealing
To protect the repaired area and prevent future cracks, apply a suitable sealant. This step is especially important if the countertop is in a high-traffic area. Follow the sealant manufacturer’s instructions for application and curing time.
Final Inspection and Touch-Ups
After completing all the above steps, perform a final inspection to ensure the repair is seamless and blends well with the countertop. If there are any minor imperfections, use a fine-grit sandpaper or a polishing compound to address them.
Expert Tips for Flawless Repairs
Precision: Precision in mixing and applying the compound is key to a flawless repair. Take your time to ensure each layer is even and properly cured. Patience: Rushing the process can lead to cracks and imperfections. Allow sufficient drying time between each step. Proper Tools: Use high-quality tools and materials for the best results. Low-grade products may not adhere well and can lead to an uneven finish.
Conclusion
Repairing cracks in your artificial stone countertop doesn’t have to be a daunting task. With the right approach, tools, and a bit of patience, you can restore your countertop to its original beauty. Remember to follow the steps carefully, take your time, and enjoy the process. If you’re ever in doubt, don’t hesitate to watch our professional tutorial video for a visual guide to ensure you’re on the right track.
Stay tuned for part two, where we will cover advanced techniques and additional tips to make your repair job flawless. Happy repairing!
By following these detailed steps and tips, you can effectively repair cracks in your artificial stone countertop, ensuring it remains beautiful and functional for years to come.