Introduction
Welcome to our detailed video tutorial on how to repair a cracked kitchen countertop! A cracked kitchen countertop can be a major concern, not just because it looks unsightly, but also because it may pose a safety hazard. Thankfully, with the right materials and techniques, you can fix it yourself and restore your kitchen to its former glory. In this first part of our comprehensive guide, we’ll cover everything you need to know to prepare for the repair and start fixing that crack.

Understanding the Damage
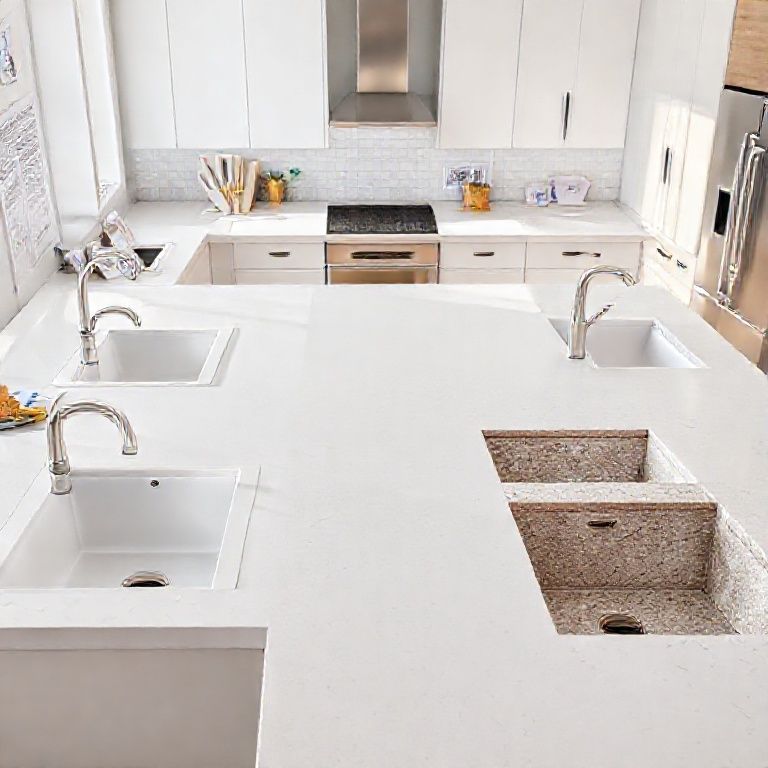
First, it’s crucial to understand the nature and extent of the damage to your kitchen countertop. The type of material your countertop is made from will dictate the repair method. Common kitchen countertop materials include granite, quartz, marble, and composite materials like Formica and laminate. Each type has its own set of repair guidelines.
Granite and Quartz: These materials are known for their durability but can still crack under extreme stress or from heavy objects. Quartz, in particular, is a composite material that can often be repaired with resin. Marble: Marble is softer and more susceptible to cracking, making repairs more delicate. Composites like Formica and Laminate: These materials can sometimes be fixed by simply applying a patch or using epoxy resin.
Gathering Your Materials
Before you start the repair, make sure you have all the necessary materials. Here’s a list of what you’ll need for most repairs:

Epoxy resin or countertop repair kit Sandpaper or a sanding block Clamps Protective gloves and safety glasses Clean cloths and a cleaning solution Putty knife Mixing container Paintbrush
Step-by-Step Preparation
Safety First: Put on your protective gloves and safety glasses to safeguard against any dust or chemicals.
Clean the Area: Thoroughly clean the cracked area and the surrounding surfaces using a mild cleaning solution. Remove any dirt, grease, or debris that could interfere with the repair.

Dry the Surface: Ensure the area is completely dry before beginning the repair process. Moisture can affect the adhesion of the epoxy resin.
Sand the Crack: Lightly sand the edges of the crack using fine-grit sandpaper. This helps to create a rough surface that will allow the epoxy to bond better. Be careful not to over-sand, as this could weaken the countertop further.
Mix the Epoxy: Follow the manufacturer’s instructions to mix the epoxy resin. Use a putty knife to apply the resin into the crack. Make sure to fill the crack completely.
Clamp the Crack: Use clamps to hold the pieces of the countertop together if the crack has caused the surface to separate. This will ensure a strong bond when the epoxy sets.
Clean Up: Wipe away any excess epoxy from the surface using a clean cloth.
Initial Repair and Drying
After applying the epoxy and clamping the crack, allow it to dry according to the manufacturer’s instructions. This usually takes several hours, but it’s important to follow the specific drying time to ensure the repair is durable.
Final Touches
Once the epoxy has fully cured, you can clean the surface again to remove any residue. For granite and quartz, you might want to polish the area to restore its shine. For composite materials, a light sanding followed by a matching countertop finish can give the repaired area a seamless look.
Conclusion
Repairing a cracked kitchen countertop is a manageable DIY project if you follow the right steps. By understanding the type of countertop you have, gathering the appropriate materials, and carefully executing the repair, you can restore your kitchen to its former beauty. In the next part of this guide, we’ll delve into more advanced techniques for specific materials and provide tips for maintaining your countertop to prevent future cracks. Stay tuned for more detailed insights!
Advanced Techniques and Maintenance Tips
Welcome back to our comprehensive guide on fixing a cracked kitchen countertop! In the previous part, we covered the basics of preparation and initial repair steps. Now, let’s dive deeper into advanced techniques for specific materials and provide tips for maintaining your countertop to prevent future cracks. This part will focus on more intricate methods for different countertop types and give you the best practices for long-lasting results.
Repairing Specific Materials
1. Granite and Quartz:
Granite and quartz are known for their durability but can still crack. Here’s how to repair them effectively:
Identify the Crack: Determine if the crack is superficial or if it has caused the countertop to split. Superficial cracks can often be repaired with epoxy resin, while deeper cracks might require a more extensive repair.
Epoxy Application: For superficial cracks, use a high-quality epoxy resin specifically designed for stone countertops. Mix the resin according to the instructions, apply it to the crack, and use a putty knife to fill the crack completely. Ensure the epoxy goes deep into the crack.
Clamping and Curing: If the crack has caused a separation, use clamps to hold the pieces together while the epoxy cures. Follow the curing time as specified by the resin manufacturer.
Finishing Touches: Once cured, polish the area to blend the repair seamlessly with the rest of the countertop. Use a granite or quartz polish to restore the shine and protect the surface.
2. Marble:
Marble is more delicate and requires careful handling:
Assess the Damage: Marble can crack due to heavy objects or thermal shock. Assess the extent of the damage. Small cracks can often be repaired, but larger cracks might require a professional.
Epoxy for Small Cracks: For minor cracks, use a specialized marble epoxy. Mix the epoxy as directed and apply it to the crack. Make sure to fill the crack thoroughly.
Clamping and Curing: If the crack has caused the marble to split, use clamps to hold the pieces together. Allow the epoxy to cure for the time specified by the manufacturer.
Finishing Touches: After curing, clean the area to remove any epoxy residue. Marble polish can help restore the surface and bring back its natural luster.
3. Composites like Formica and Laminate:
Composite materials like Formica and laminate are easier to repair:
Identify the Crack: Determine if the crack is superficial or if the material has lifted. Superficial cracks can often be repaired with a patching compound or epoxy resin.
Patching Compound: For minor cracks, use a countertop patching compound. Mix it according to the instructions, apply it to the crack, and smooth it out.
Epoxy for Larger Cracks: For larger cracks, use an epoxy resin. Apply it to the crack and use a putty knife to fill it completely.
Clamping and Curing: If the crack has caused the material to separate, use clamps to hold the pieces together. Follow the curing time specified by the resin manufacturer.
Finishing Touches: Once cured, sand the area lightly if needed and apply a matching countertop finish to blend the repair seamlessly with the rest of the surface.
Preventing Future Cracks
Preventing future cracks is just as important as repairing existing ones. Here are some tips to help you maintain your countertop and avoid damage:
Use Protective Pads: Always use protective pads under heavy objects like pots, pans, and cutting boards to prevent direct contact with the countertop.
Avoid Thermal Shock: Do not place hot pots or pans directly on cold countertops. Allow them to cool slightly before placing them on the surface.
Regular Cleaning: Clean your countertop regularly to remove spills and stains promptly. Use a mild cleaning solution and avoid harsh chemicals that can damage the surface.
Seal Periodically: Depending on the material, periodic sealing can help maintain the integrity of the countertop. Follow the manufacturer’s recommendations for sealing your specific type of countertop.
Prompt Repair: Address any minor cracks or chips immediately before they worsen. Small repairs are often easier and less costly than dealing with larger damage.
Conclusion
Repairing a cracked kitchen countertop can be a rewarding DIY project that enhances the appearance and longevity of your kitchen. By understanding the specific repair techniques for different materials and following the steps carefully, you can achieve a professional-looking repair. Remember to take preventive measures to avoid future cracks and keep your countertop in top condition. For more detailed guidance and visual tutorials, stay tuned to our channel for additional tips and videos. Your kitchen deserves the best care, and with these techniques, you’re well on your way to a beautifully restored countertop!