Discover the secrets to restoring the beauty and functionality of your artificial stone countertops with our comprehensive, easy-to-follow video guide. In this detailed tutorial, we’ll explore everything you need to know about repairing cracks in artificial stone, ensuring your kitchen or bathroom looks as good as new. This article will be divided into two parts for your convenience, providing you with all the information you need to tackle this DIY project.

artificial stone countertop repair, crack repair video, DIY stone countertop fix, countertop restoration, kitchen countertop repair, bathroom countertop repair, how to fix stone cracks, stone countertop restoration video, home improvement, countertop maintenance
How to Repair Cracks in Artificial Stone Countertops: A Step-by-Step Video Guide
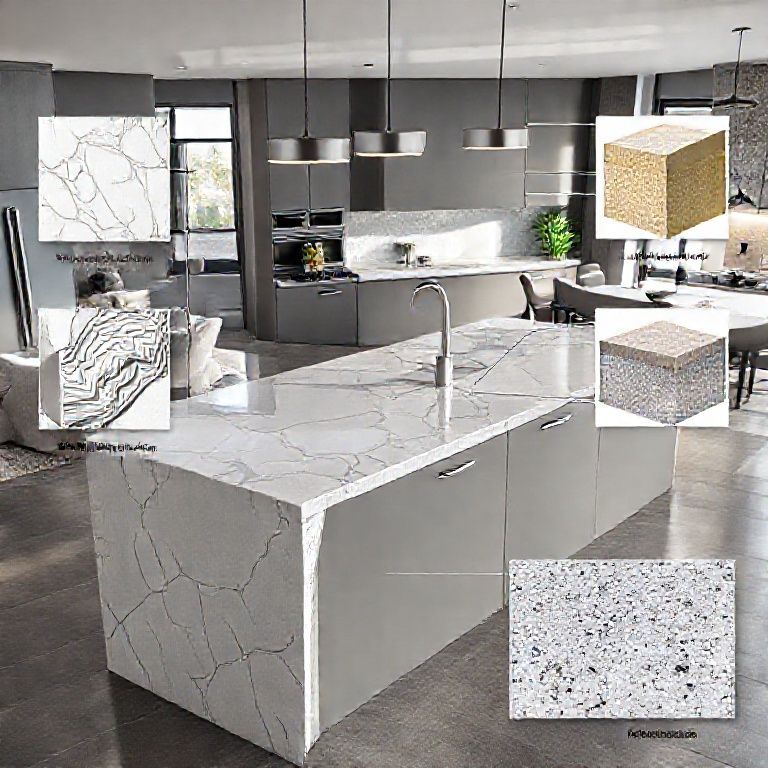
Artificial stone countertops are known for their durability, aesthetic appeal, and low maintenance. However, over time, they can develop cracks due to various factors like accidental drops, impacts, or even wear and tear. Repairing these cracks might seem daunting, but with the right tools and techniques, you can restore your countertops to their pristine condition. In this first part of our comprehensive guide, we’ll cover the initial steps, tools you’ll need, and a detailed explanation of the repair process.
Initial Steps and Safety Precautions
Before diving into the repair process, it’s crucial to understand the initial steps and safety precautions you should take. Here’s what you need to do:
Assess the Damage: Begin by examining the crack to determine its size, depth, and whether it’s isolated or spreading. This will help you decide on the best repair method.
Clean the Area: Use a damp cloth to clean the area around the crack. Make sure there is no dirt, grime, or moisture that could interfere with the repair process.
Safety Gear: Put on protective gloves and eyewear to safeguard yourself from any sharp edges or materials you might encounter during the repair.
Ventilation: Ensure the workspace is well-ventilated to avoid inhaling any fumes from the repair materials.
Essential Tools and Materials
Having the right tools and materials on hand is crucial for a successful repair. Here’s a list of what you’ll need:
Epoxy Resin: A two-part epoxy resin specifically designed for stone countertops is ideal. It’s strong, durable, and offers a seamless repair.

Mixing Container: A disposable container to mix the epoxy resin.
Epoxy Mixing Stick: To thoroughly combine the epoxy components.
Epoxy Hardener: Ensure you have the correct hardener for your epoxy resin.
Fine Sandpaper: For smoothing out any rough edges or surfaces around the crack.
Latex Gloves: To protect your hands during the repair process.
Plastic Spatula: To spread the epoxy resin smoothly along the crack.
Masking Tape: To prevent the epoxy from seeping into unwanted areas.
Cleaning Supplies: Isopropyl alcohol and a clean cloth for cleaning up any spills or excess epoxy.
Step-by-Step Repair Process
Now that you have your tools and materials ready, let’s walk through the step-by-step repair process:
Mix the Epoxy Resin: Follow the manufacturer’s instructions to mix the epoxy resin and hardener in the designated mixing container. This usually involves combining equal parts of resin and hardener and stirring thoroughly until fully mixed.
Prepare the Crack: Using fine sandpaper, gently sand the edges of the crack to create a smooth surface. This will help the epoxy adhere better and create a seamless repair.
Apply Masking Tape: Place masking tape along the edges of the crack to act as a barrier, preventing the epoxy from spreading into unwanted areas.
Apply Epoxy Resin: Using the plastic spatula, apply a thin layer of epoxy resin along the crack. Start from one end and work your way to the other, ensuring a continuous application.
Smooth the Epoxy: Use the spatula to smooth out the epoxy, ensuring it fills the crack completely. Wipe away any excess epoxy that seeps out with a clean cloth.
Let it Cure: Allow the epoxy to cure as per the manufacturer’s instructions. This usually takes several hours, but it’s essential to follow the recommended curing time to ensure maximum strength.
Remove Masking Tape: Once the epoxy has cured, carefully remove the masking tape.
Sand the Area: Lightly sand the repaired area with fine sandpaper to smooth out any rough edges and blend the epoxy seamlessly with the surrounding countertop.
Clean Up: Clean the area with isopropyl alcohol to remove any residual epoxy and ensure a pristine finish.
By following these steps, you can effectively repair cracks in artificial stone countertops, restoring their appearance and durability. In the next part of our guide, we’ll delve deeper into more advanced repair techniques and provide tips for maintaining your stone countertops to prevent future cracks.
How to Repair Cracks in Artificial Stone Countertops: Advanced Techniques and Maintenance Tips
Repairing cracks in artificial stone countertops is a straightforward process when you have the right tools and techniques. However, for more complex repairs or to maintain the longevity of your countertops, understanding advanced techniques and proper maintenance is key. In this second part of our comprehensive guide, we’ll explore advanced repair methods, share professional tips, and discuss how to keep your artificial stone countertops in top condition.
Advanced Repair Techniques
While basic epoxy repair is effective for minor cracks, more significant or intricate damage may require advanced techniques. Here are some advanced methods to consider:
Crack Injection: For deep cracks that cannot be filled with epoxy alone, crack injection is an effective method. This involves using a specialized resin that is injected into the crack under pressure, filling it completely and ensuring a strong bond.
Slab Repair: In cases where the crack is too extensive, a slab repair might be necessary. This involves cutting out the damaged section and replacing it with a new piece of artificial stone. A professional technician can seamlessly integrate the new piece, ensuring it matches the original countertop in color and texture.
Heat Treatment: For particularly stubborn cracks, heat treatment can help. This method involves heating the epoxy resin to a specific temperature, which makes it more pliable and easier to fill deep cracks. Once cooled, the epoxy hardens, creating a strong bond.
Professional Tips for Effective Repair
Professional technicians often have a few tips up their sleeves to ensure the best results when repairing artificial stone countertops. Here are some expert tips to keep in mind:
Color Matching: To ensure a seamless repair, it’s essential to match the color of the epoxy resin to your countertop. Use a small amount of epoxy resin to test for color before applying it to the crack.
Avoid Overmixing: Overmixing epoxy resin can lead to air bubbles, which can compromise the strength of the repair. Mix the epoxy resin and hardener gently and thoroughly until combined.
Temperature Control: The temperature of the room and the epoxy resin itself can affect the curing process. Ensure the room is at a stable temperature and avoid applying epoxy in extreme heat or cold.
Patience with Curing: Allow the epoxy to cure fully before using the countertop. Rushing the process can weaken the repair. Follow the manufacturer’s curing instructions closely.
Maintenance Tips to Prevent Future Cracks
Preventing future cracks is as important as repairing existing ones. Here are some maintenance tips to help keep your artificial stone countertops in pristine condition:
Use Cutting Boards: To prevent scratches and cracks, always use cutting boards when preparing food on your countertops. This is especially important if you cut hard foods like carrots or potatoes.
Avoid Heavy Objects: Avoid placing heavy objects directly on the countertop. This can cause stress points that may lead to cracks over time.
Immediate Cleanup: Spills and spills can weaken the material over time. Clean up any spills immediately to prevent stains and potential cracks.
Heat Protection: Avoid placing hot pots or pans directly on the countertop. Use trivets or pot holders to protect the surface from heat damage.
Regular Cleaning: Use mild soap and water to clean your countertops regularly. Avoid harsh chemicals that can damage the surface.
Scratch-Resistant Coating: Consider applying a scratch-resistant coating to your countertops. This can provide an additional layer of protection against scratches and minor impacts.
Final Thoughts
Repairing cracks in artificial stone countertops is a manageable DIY project if you follow the right steps and use the appropriate materials. By understanding both basic and advanced repair techniques, as well as implementing proper maintenance practices, you can ensure your countertops remain beautiful and functional for years to come.
Whether you’re tackling a small crack with basic epoxy or dealing with more significant damage with advanced methods, our step-by-step guide provides everything you need to know. Remember, patience and precision are key to achieving the best results.
For a detailed visual guide, watch our video tutorial where we walk you through each step of the repair process in real-time. This will give you a clearer understanding of the techniques and help you tackle any future repairs with confidence.
By following these tips and guidelines, you’ll not only restore your artificial stone countertops but also extend their lifespan, ensuring they continue to enhance the beauty of your kitchen or bathroom.