
The heart of any home often beats strongest in the kitchen, and the countertops are its silent, hardworking stage. They bear witness to culinary creations, hurried breakfasts, and lively conversations. When your artificial marble countertops, once pristine and gleaming, start to show signs of wear – a hairline scratch here, a small chip there, or a general dullness that dims their once vibrant sheen – it can feel like a blow to the aesthetic of your beloved space. The immediate thought might be a costly replacement, conjuring images of disruptive renovations and significant expense. However, before you resign yourself to that drastic measure, consider this: many common issues with artificial marble countertops are surprisingly amenable to do-it-yourself repairs.
Artificial marble, also known as engineered stone or composite quartz, is a popular choice for its durability, aesthetic appeal, and relatively lower maintenance compared to natural stone. It’s composed of crushed quartz or granite mixed with resins and pigments, pressed and polished to mimic the look of natural marble or granite. While robust, it’s not entirely impervious to damage. Understanding the nature of artificial marble is the first step in effectively tackling its imperfections. Unlike natural stone, which is porous and susceptible to staining, artificial marble is less so, but its resinous component can be vulnerable to heat, harsh chemicals, and abrasive scrubbing. This is where your DIY prowess can shine.
The most common culprits that mar the surface of artificial marble countertops are superficial scratches and minor chips. Scratches, especially lighter ones, often occur from everyday use – sliding pots and pans, knives accidentally making contact, or even abrasive cleaning materials. Chips, though less frequent, can happen if a heavy object is dropped directly onto an edge or corner. Beyond these physical blemishes, artificial marble can also lose its luster over time due to regular use and exposure to cleaning agents that may not be ideally suited for its composite nature. These issues, while noticeable, are often salvageable with the right approach and a bit of patience.
Before embarking on your repair journey, a thorough assessment of the damage is paramount. Take a close look at the affected areas. Are the scratches deep and gouging, or are they merely surface-level abrasions that catch the light? Are the chips small and contained, or are they large fragments that have come loose? For scratches, try to gauge their depth. A simple test is to run your fingernail lightly across the scratch. If your nail catches on it, it’s likely a deeper scratch requiring more attention. If your nail glides over it smoothly, it’s probably a superficial scratch that can be addressed with polishing compounds. For chips, assess the size and the integrity of the surrounding material. If the chip is very small and there are no cracks radiating from it, it’s a good candidate for a DIY fill.
Once you’ve diagnosed the problem, the next crucial step is gathering your arsenal of tools and materials. For superficial scratches, you’ll typically need a polishing compound specifically designed for engineered stone or quartz. These compounds contain fine abrasives that gently abrade the surface, effectively leveling out minor imperfections. A microfiber cloth is essential for applying the compound and buffing the area to a shine. For deeper scratches or minor chips, you’ll need a specialized repair kit. These kits usually contain a color-matched epoxy filler or resin, a curing agent, and sometimes even a tinting system to help you achieve the perfect hue. Applicator tools like spatulas or small brushes will be needed to precisely apply the filler. Sandpaper of varying grits, starting with a coarser grit and moving to finer ones, will be essential for leveling and smoothing the filled area. Safety goggles and gloves are always a wise precaution, especially when working with resins and abrasive compounds.
Let’s first tackle the most common foe: the superficial scratch. Imagine you’ve been preparing a meal, and in the flurry of activity, a pot or pan has left a faint, silvery line across your beautiful countertop. Don’t panic! This is where the magic of polishing compounds comes into play. Choose a reputable brand that explicitly states its suitability for engineered quartz or artificial marble. These compounds often contain microscopic abrasives that work by very gently removing a thin layer of the surface material, effectively erasing the scratch.
The process is straightforward but requires a methodical approach. Begin by thoroughly cleaning the affected area. Use a mild, pH-neutral cleaner and a soft cloth to remove any dust, debris, or grease. Ensure the surface is completely dry before proceeding. Apply a small amount of the polishing compound directly onto the scratched area. A little goes a long way. Using a clean microfiber cloth, begin to work the compound into the scratch using a circular motion. Apply moderate, consistent pressure. The key here is patience. You’re not trying to buff it out in one go. Work the compound for a minute or two, then wipe away the excess with a clean section of the cloth and inspect your progress. You might see a subtle improvement. Continue this process, applying more compound and buffing, periodically wiping away the residue to check. It might take several applications and rounds of buffing to see the scratch disappear completely, especially if it’s slightly more than a whisper.
Once the scratch is no longer visible, or is significantly diminished to your satisfaction, it’s time to bring back the shine. Use a fresh, dry microfiber cloth to buff the entire repaired area until it gleams, matching the surrounding countertop. You may want to buff a slightly larger area around the repair to ensure a seamless blend. The goal is to make the repair invisible, not just functional. This process of gentle abrasion and careful buffing is incredibly effective for addressing those everyday battle scars that can accumulate on your countertops. It’s a testament to the fact that sometimes, the simplest solutions are the most powerful. Remember, the surface of artificial marble has a polished finish, and you are aiming to restore that finish, not alter it. So, take your time, be gentle, and you’ll be amazed at how a little elbow grease and the right polishing compound can restore the flawless appearance of your artificial marble countertops. This initial step of addressing surface-level imperfections sets the stage for more involved repairs, building your confidence and skill as you move forward in revitalizing your kitchen or bathroom’s focal point.
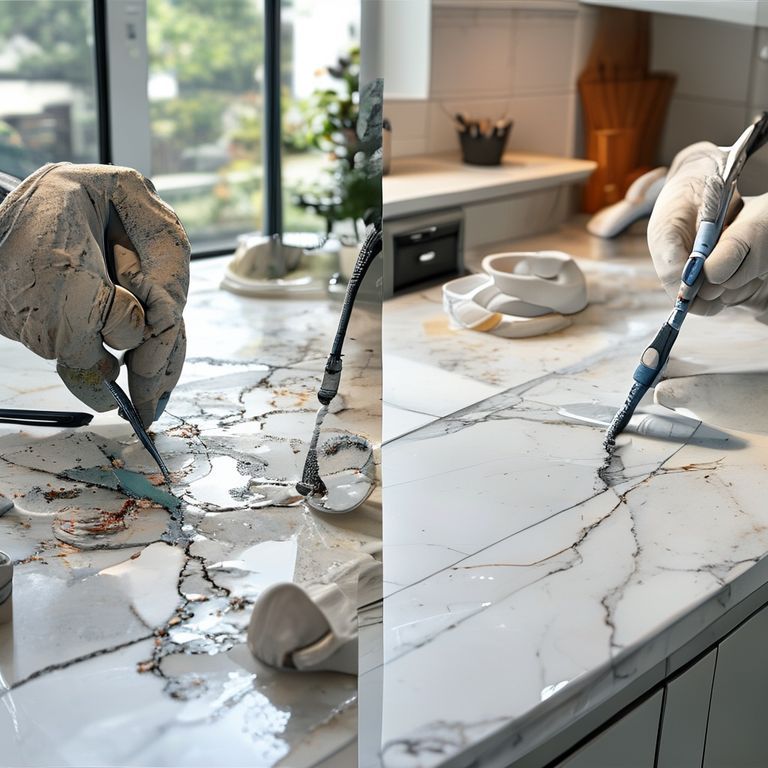
Moving beyond superficial scratches, let’s address the slightly more daunting, yet entirely manageable, challenges of chips and deeper imperfections in your artificial marble countertops. These are the moments when you might feel a pang of concern, but remember, with the right materials and a careful hand, you can achieve a remarkably seamless repair. The principle behind repairing chips and deeper damage is to fill the void with a material that bonds securely to the artificial marble and, ideally, matches its color and finish. This is where specialized epoxy repair kits for engineered stone come into play.
The process for chip repair is similar to scratch repair in its preparation but requires a more precise application of filling material. First and foremost, clean the chipped area meticulously. Use a soft brush or a cotton swab with a bit of isopropyl alcohol to ensure there’s no dust, debris, or moisture trapped within the chip. Any contaminants will compromise the bond of the filler and can lead to a less-than-perfect result. If the chip has created any sharp or jagged edges, you might gently buff them down with a very fine-grit sandpaper (e.g., 600-grit or higher) and water to create a smoother surface for the filler to adhere to. Be extremely careful not to enlarge the chip or damage the surrounding material.
Now comes the critical part: mixing and applying the filler. Most artificial marble repair kits provide a two-part epoxy system. You’ll need to carefully measure and mix the resin and the hardener according to the manufacturer’s instructions. This is where precision is key, as an incorrect ratio can lead to the filler not curing properly, remaining sticky, or becoming too brittle. Many kits also include a color tinting system. This is your opportunity to achieve a perfect match. Start by adding a tiny amount of pigment to the mixed resin. Stir thoroughly and compare the color to your countertop, ideally in good natural light. It’s always better to err on the side of caution and add color incrementally, as it’s easier to add more than to remove excess pigment. Aim for a shade that is slightly lighter than your countertop, as the color often darkens slightly as it cures.
Once your filler is mixed and the color is as close as you can get it, use a small spatula, putty knife, or even a popsicle stick to carefully apply the mixture into the chip. Press the filler firmly into the void, ensuring there are no air bubbles. Work from the edges of the chip inwards. The goal is to overfill the chip slightly, creating a small mound of filler. This excess material will be leveled down later. Once the chip is filled, allow it to cure completely according to the manufacturer’s instructions. This curing time can vary significantly, so be patient. Rushing this step will compromise the integrity of the repair.
After the filler has fully cured, the painstaking work of leveling and finishing begins. This is where you transform a filled hole into an invisible mend. Start with a medium-grit sandpaper (e.g., 320-grit or 400-grit), used wet, to gently sand down the excess filler until it is flush with the surrounding countertop surface. Use light, consistent strokes and check your progress frequently. The aim is to create a smooth, level surface without abrading the original countertop material excessively. Once the excess filler is removed, gradually move to finer grits of sandpaper (e.g., 600, 800, 1200, and even higher if available). Each finer grit will further smooth the surface, removing the scratches left by the previous grit. Wet sanding is crucial throughout this process, as it lubricates the sandpaper, prevents clogging, and helps to achieve a smoother finish.
The final stage of the repair involves restoring the sheen to the mended area. Once you’ve achieved a smooth, matte finish with the finest grit sandpaper, you’ll need to polish the area back to its original luster. You can use the same polishing compound recommended for superficial scratches, working it into the sanded area with a microfiber cloth. Buff the area vigorously until it blends seamlessly with the surrounding countertop. For very minor imperfections in the sheen, you might even consider using a polishing cream specifically designed for artificial stone. The objective is to make the repaired area indistinguishable from the original surface.
Beyond chips, this method can also be adapted for minor cracks or even shallow gouges. For deeper cracks, ensure the crack is thoroughly cleaned and that the filler penetrates as much as possible. For gouges, the process is similar to chip repair, where you fill the void and then level and polish. Always remember to work in good lighting and to take breaks to rest your eyes and assess your work with a fresh perspective.
Maintaining the beauty of your artificial marble countertops involves more than just repairs; it’s also about prevention and proper care. Avoid placing hot pots and pans directly onto the surface, as the resin can be damaged by extreme heat. Use trivets and hot pads consistently. While artificial marble is more stain-resistant than natural stone, it’s still wise to wipe up spills promptly, especially acidic liquids like wine or citrus juice, and avoid harsh chemical cleaners like bleach or ammonia, which can dull the finish. Opt for mild dish soap and water or specialized engineered stone cleaners. Regularly sealing your countertops, though not as critical as with natural stone, can also add an extra layer of protection and maintain that factory-fresh shine.
DIY repair of artificial marble countertops is not about achieving absolute perfection that would fool a seasoned stone fabricator at first glance. It’s about restoring functionality, improving aesthetics, and saving yourself significant expense. It’s about empowering yourself with the knowledge and tools to care for your home. With patience, the right materials, and a careful approach, you can effectively mend those everyday imperfections, keeping your kitchen and bathroom surfaces looking beautiful and feeling cherished for years to come. So, the next time a minor mishap leaves its mark, don’t fret. Embrace the challenge, follow these steps, and celebrate the satisfaction of a job well done.


