
The allure of artificial marble – its consistent beauty, its practicality, its ability to mimic the grandeur of natural stone without the hefty price tag – is undeniable. It graces our kitchens as countertops, our bathrooms as vanity tops and sinks, and even finds its way into decorative elements. Yet, like any surface that endures daily life, artificial marble isn’t immune to the occasional mishap. Scratches from everyday use, chips from accidental bumps, or dullness from years of exposure can detract from its original splendor. The good news? These imperfections are rarely permanent. The world of artificial marble repair is a fascinating blend of science and artistry, offering accessible and effective solutions to breathe new life into your cherished surfaces.
Understanding your adversary is the first step in any successful restoration. Artificial marble, often referred to as solid surface material, is typically composed of acrylic polymers and mineral fillers. This composition grants it a certain resilience, but also dictates how it responds to damage and repair. Unlike natural stone, which has a complex crystalline structure, artificial marble is non-porous and uniform throughout. This uniformity is a double-edged sword: it means that a scratch or chip exposes material identical to the surface layer, making seamless repairs possible. However, it also means that aggressive or incorrect repair methods can permanently alter the appearance of the surrounding material.
The most common culprits of artificial marble distress are superficial scratches. These can range from faint, almost invisible lines to deeper gouges that catch the light. For the minor ones, often caused by abrasive cleaning pads or the bottoms of ceramic dishes, a simple polishing technique can work wonders. Many artificial marble manufacturers recommend specific polishing compounds or even fine-grit sandpaper (starting with a higher grit, like 400, and progressing to much finer grits, such as 800, 1500, and even 2000 or higher). The key here is patience and a gentle touch. You’ll be working on a small area, essentially sanding down the surface slightly around the scratch to level it out. Always work in a consistent direction, and then transition to circular motions as you move to finer grits to blend the area. It’s crucial to keep the area moist during sanding to prevent heat buildup and to help carry away the abraded material. A spray bottle filled with water is your best friend in this endeavor. After sanding, a polishing compound specifically designed for solid surfaces will restore the sheen. Apply a small amount to a clean, soft cloth and rub it into the repaired area. You’ll notice the surface gradually becoming smoother and more reflective. This process requires a keen eye to ensure you’re blending the sanded area seamlessly with the original finish. It’s not about removing the scratch entirely through brute force, but rather about subtly reducing the depth of the scratch by smoothing the surrounding material.
For more significant scratches or minor chips where a small piece of the material has been removed, a different approach is necessary. This is where specialized repair kits come into play. These kits typically contain a filler material that closely matches the color and composition of your artificial marble, along with applicators and sanding/polishing supplies. The process often involves mixing a two-part adhesive or filler to achieve the desired consistency and color match. For chips, the goal is to fill the void completely. This might require building up the filler in thin layers, allowing each layer to cure according to the product instructions. Once the filler is fully hardened, the real work of restoration begins. This involves carefully sanding down the excess filler to be perfectly flush with the surrounding surface. Again, the progression through grits of sandpaper is paramount. Start with a coarser grit to quickly remove the bulk of the excess material, then move to progressively finer grits to smooth the surface to a polished finish. The aim is to make the repair entirely undetectable. This requires a delicate touch and a constant assessment of the surface. You’ll be looking for any unevenness, any slight difference in texture or sheen compared to the original. This is where the “art” truly comes into play. It’s not just about filling a hole; it’s about making the repair an invisible part of the whole.
Beyond physical damage, artificial marble can lose its luster over time due to mineral deposits from hard water, residue from cleaning products, or simply the cumulative effect of daily wear. This dullness can make even well-maintained countertops look tired and uninviting. Restoring this lost sheen is often a more straightforward process than dealing with physical damage. A good quality artificial marble cleaner or a mild abrasive polish can often lift away the surface grime and reveal the original brightness. For stubborn water spots or rings, a paste made from baking soda and water can be surprisingly effective. Apply the paste to the affected area, let it sit for a few minutes, and then gently scrub with a soft cloth. Rinse thoroughly and dry. For a more comprehensive revitalization, consider using a specialized solid surface polish. These polishes often contain very fine abrasive particles that gently buff the surface, removing micro-scratches and restoring a high-gloss finish. Applying these polishes regularly can also help to protect the surface and make it more resistant to future staining and scratching. It’s about maintaining that factory-fresh look, ensuring that your artificial marble continues to be a beautiful and functional centerpiece in your home. Remember, prevention is always better than cure, but when damage does occur, understanding the material and employing the right techniques will ensure a successful restoration.
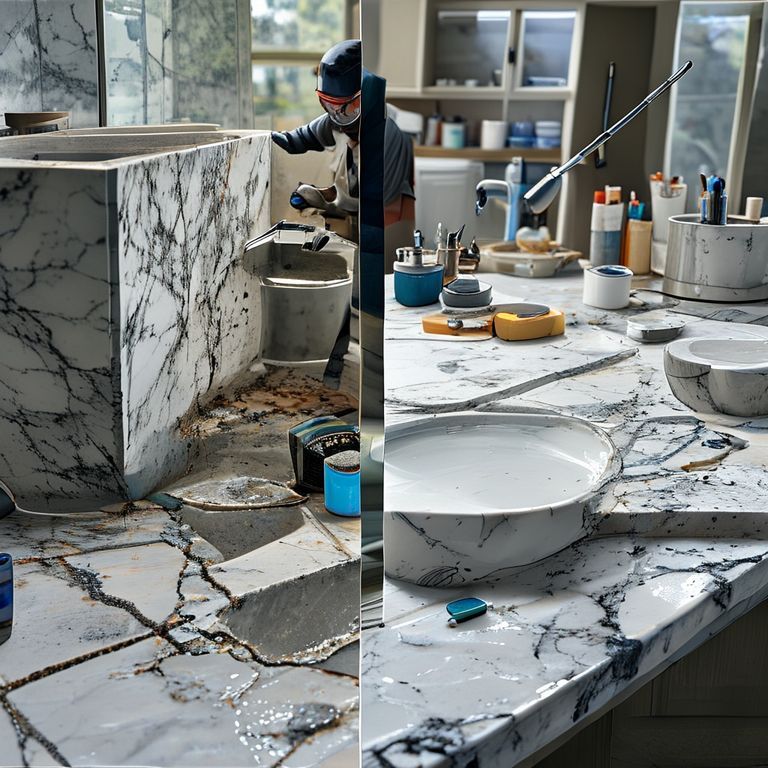
Continuing our journey into the world of artificial marble restoration, let’s delve deeper into the nuances of tackling more challenging repairs and the importance of proper preparation and finishing. While superficial scratches and minor chips can often be managed with DIY kits and a patient hand, some issues might require a more professional approach, or at least a very thorough understanding of the underlying principles. One such challenge is the repair of deeper gouges or significant delamination, where the layers of the artificial marble may have started to separate. In these cases, the initial cleaning and preparation phase becomes even more critical. Any debris, grease, or loose material must be meticulously removed from the damaged area. This might involve using a degreaser and a soft brush, followed by a thorough rinse and drying. For delamination, a specialized adhesive designed for solid surfaces might be necessary to re-bond the layers. This often requires carefully injecting the adhesive into the gap and then applying even pressure to ensure a strong bond as it cures. This step is delicate, as improper pressure or adhesive application can lead to further damage or an uneven surface.
When it comes to filling larger chips or cracks, the choice of filler material is paramount. Most repair kits offer a range of colors or a universal filler that can be tinted to match your specific artificial marble. Achieving a perfect color match is an art in itself. It often involves mixing small batches of the filler with pigments, comparing the color to an inconspicuous area of your countertop, and adjusting until the match is as close as possible. Remember that the color of the filler can change slightly as it cures, so it’s wise to test a small amount in an inconspicuous area first if possible. Once the filler is mixed and applied, the curing process is vital. Rushing this stage can lead to a weak repair that may crack or discolor later. Follow the manufacturer’s instructions precisely regarding curing times. After curing, the sanding and polishing phase for larger repairs can be quite extensive. You’ll be working to feather the edges of the filler seamlessly into the surrounding material. This means starting with a grit of sandpaper that can effectively shape the filler without aggressively abrading the original surface. As you progress to finer grits, the goal is to achieve a smooth, uniform surface that reflects light identically to the surrounding material. It’s often helpful to use a sanding block to ensure you’re keeping the surface perfectly flat. The transition from filler to original material should be imperceptible.
For those who are less confident in their DIY abilities, or for particularly extensive or complex damage, professional restoration services are a valuable option. These specialists have the expertise, specialized tools, and proprietary materials to achieve results that are often indistinguishable from the original. They can handle everything from deep scratches and large chips to burns and even cracks that run through the material. Their process often involves using industrial-grade sanding and polishing equipment, along with advanced color-matching systems. They can also address issues like thermal shock damage, where rapid temperature changes can cause artificial marble to crack or craze. While professional repair might seem like a significant investment, it can often be more cost-effective than replacing an entire countertop or sink, especially for high-end artificial marble installations. It’s also a way to ensure a flawless finish that maintains the aesthetic integrity of your home.
Beyond the immediate repair, maintaining the beauty of your artificial marble is an ongoing process. Regular cleaning with mild, non-abrasive cleaners is essential. Avoid harsh chemicals, bleach, and abrasive scouring pads, as these can dull the surface or even damage the protective layer. For spills, especially acidic ones like lemon juice or vinegar, wiping them up immediately is crucial to prevent etching. Using cutting boards and trivets will also significantly reduce the risk of scratches and heat damage. For sinks, it’s a good practice to rinse them thoroughly after use, especially if you’ve used abrasive cleaning products. The non-porous nature of artificial marble makes it inherently hygienic and easy to clean, but this benefit is best preserved through consistent, gentle care.
When considering a repair, especially for a significant issue, it’s always a good idea to consult the manufacturer of your artificial marble product. They often have specific recommendations for cleaning, maintenance, and repair, and may even offer their own repair kits or recommend certified technicians. Understanding the specific type of artificial marble you have can also inform the best repair strategy. Some higher-end engineered stones might have different repair protocols than standard solid surface materials.
In conclusion, the ability to repair artificial marble is a significant advantage of this popular material. It empowers homeowners to address minor wear and tear themselves, extending the lifespan and maintaining the aesthetic appeal of their surfaces. From the simple buffing of a faint scratch to the meticulous filling and sanding of a larger chip, the process, while sometimes requiring patience and precision, is ultimately rewarding. It’s about preserving the investment you’ve made in your home and ensuring that these beautiful surfaces continue to bring joy and functionality for years to come. Whether you choose to tackle a repair yourself with a readily available kit or opt for the expertise of a professional, the outcome is a revitalized surface that looks as good as new, proving that the art of restoration can indeed bring your artificial marble back to its former glory.


