
The gleam of a new countertop is undeniable. Whether it’s the cool, sophisticated allure of natural stone or the practical, versatile charm of artificial marble, a pristine kitchen or bathroom surface sets a certain tone. However, life happens. Spills, dropped pots, the relentless march of everyday use – they all take their toll. Suddenly, that once-perfect surface begins to show its age. Scratches mar the smooth finish, small chips appear like unwelcome blemishes, and the overall luster seems to fade, leaving you with a sense of disappointment and perhaps a longing for a costly replacement. But what if I told you that your beloved artificial marble surfaces aren’t destined for the landfill? What if there’s a way to breathe new life into them, to reverse the damage and restore their original beauty?
This is where the fascinating world of artificial marble repair comes into play. It’s not just about patching up a flaw; it’s about understanding the very nature of this material and employing techniques that can seamlessly blend new with old, making the damage virtually disappear. Artificial marble, often a composite of acrylic resins, mineral fillers, and pigments, possesses a unique set of properties that make it both durable and repairable. Unlike natural stone, which can be porous and reactive, the engineered nature of artificial marble offers a more predictable and controllable surface for restoration.
The journey to repairing artificial marble begins with a thorough assessment of the damage. Is it a superficial scratch that has only affected the top layer of resin? Or is it a deeper gouge that has penetrated into the composite material? Is it a minor chip that has broken off a small piece, or a larger section that has been compromised? The answers to these questions will dictate the approach and the tools required for the repair.
For minor scratches, the process often resembles a delicate form of sanding and polishing. Imagine a craftsman meticulously smoothing out an imperfection on a piece of wood. The principle is similar, but the materials are different. Fine-grit sandpaper, often starting at around 400 grit and progressing to much finer grits (like 1000, 2000, and even higher), is used to gently abrade the surface. The goal here is to level the scratch with the surrounding material. This creates a dull area where the scratch once was, but that’s where the polishing comes in. A specialized polishing compound, often containing fine abrasives, is then applied. This is worked into the surface, typically with a soft cloth or a buffing pad on a low-speed polisher. The compound works by gradually smoothing the surface and restoring the sheen. It’s a process that requires patience and a keen eye, as over-polishing can lead to an uneven finish. The key is to work in small sections, checking your progress frequently.
Moving on to slightly deeper scratches or minor surface abrasions, the technique might involve a bit more substance. Here, a clear acrylic resin or a specialized filler designed for artificial marble comes into play. This filler is carefully mixed with a hardener, often in a precise ratio, and then applied to the damaged area. The goal is to fill the void left by the scratch. This is where artistry truly comes into play. The filler needs to be applied evenly, ensuring it’s flush with the surrounding surface. Excess filler is then carefully scraped away with a sharp blade or a spatula, again, with the aim of achieving a smooth transition. Once the filler has cured, the sanding and polishing process, as described for minor scratches, is then employed to blend the repaired area seamlessly. The color and opacity of the filler are also critical. In many cases, the filler is clear, allowing the underlying color and pattern of the artificial marble to show through. However, for more significant damage or when dealing with opaque artificial marble, color-matching might be necessary, which adds another layer of complexity to the repair.
Now, let’s talk about chips and more significant voids. This is where the repair becomes more akin to a form of sculptural reconstruction. For small chips, where a piece has broken off but is still available, the process might involve reattaching the fragment using a strong adhesive, often a cyanoacrylate or an epoxy designed for plastics. Once bonded, the excess adhesive is carefully removed, and the area is then treated with filler and polished as described previously.
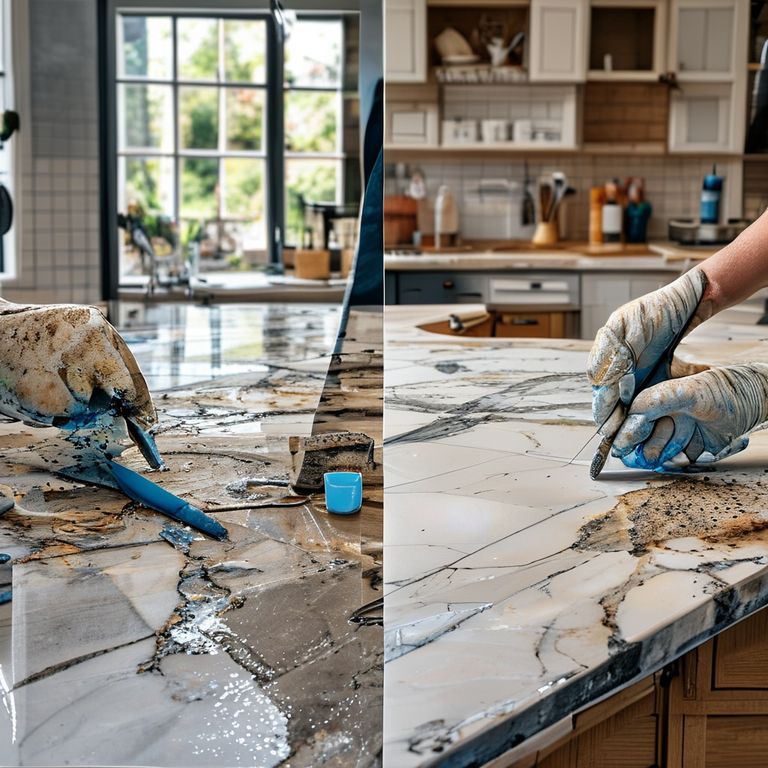
However, when a piece is lost or the damage is more extensive, the repair involves fabricating a new piece to fill the void. This is where specialized repair kits for artificial marble shine. These kits typically contain a two-part resin that can be mixed to achieve the desired consistency and color. The process often involves masking off the surrounding area to prevent accidental damage or over-application. The resin is then carefully mixed, and if necessary, pigments are added to match the color and pattern of the existing countertop. This is a critical step; achieving a perfect color match can be challenging, as artificial marble can have subtle variations in its flecks and veins. Once mixed, the resin is poured or carefully applied into the damaged area. The goal is to overfill slightly, creating a small dome of material that can be later leveled. After the resin has fully cured – which can take several hours depending on the product and environmental conditions – the excess material is meticulously ground down and then sanded and polished to match the surrounding surface. This multi-stage sanding process is crucial, moving from coarser grits to finer ones, ensuring that the newly filled area is perfectly integrated with the original material, leaving no discernible seam or difference in texture. The skill here lies in the precision of the sanding and polishing, ensuring that the repaired section is not only structurally sound but also visually indistinguishable from the original.
Professional repair services often employ more advanced techniques and specialized equipment. They might use UV curing resins, which harden almost instantaneously under ultraviolet light, significantly speeding up the repair process. They also have access to a wider range of pigments and color-matching systems, allowing them to achieve a near-perfect match for even the most complex patterns. Furthermore, professional technicians are trained to assess the extent of damage and choose the most appropriate repair method, ensuring durability and aesthetic appeal. They understand the specific formulations of different artificial marble brands and can tailor their approach accordingly. This level of expertise is invaluable when dealing with particularly stubborn damage or when aiming for a flawless finish. The investment in professional repair can often be significantly less than the cost of replacing the entire countertop, making it a smart and economical choice for many homeowners.
The decision to repair artificial marble versus replacing it often hinges on a few key factors: the extent of the damage, your budget, and your tolerance for imperfection. While minor scratches can often be tackled with a DIY approach, more significant damage, such as deep gouges, large chips, or widespread dullness, may warrant professional intervention. The beauty of artificial marble repair lies in its potential to restore surfaces that might otherwise be considered beyond saving. It’s a testament to material science and skilled craftsmanship, offering a sustainable and cost-effective alternative to full countertop replacement.
Let’s delve deeper into the nuances of DIY repair, a path that many homeowners choose for its cost savings and the satisfaction of a successful project. The most common culprit for dullness and minor scratches is the everyday wear and tear that kitchens and bathrooms endure. Food acids, cleaning chemicals, abrasive sponges, and even simple friction can dull the once-brilliant finish. For these issues, a polishing compound is your best friend. These compounds, readily available at hardware stores and online retailers, contain very fine abrasive particles suspended in a cream or paste. When rubbed onto the surface, they gently remove a microscopic layer of the material, effectively erasing light scratches and restoring the shine.
The process for using a polishing compound typically involves cleaning the area thoroughly to remove any dirt or debris. Then, a small amount of the compound is applied to a soft, lint-free cloth or a microfiber applicator pad. You then work the compound into the dull or scratched area using a circular or back-and-forth motion, applying moderate pressure. It’s important to work in small sections and to frequently wipe away the residue to assess your progress. You’ll notice the area becoming shinier as you continue. For more stubborn dullness, you might need to repeat the process or use a slightly more aggressive polishing compound. Some kits even include a fine-grit sandpaper for initial abrasion before polishing, which can be effective for slightly deeper imperfections. A word of caution: always test any repair product on an inconspicuous area first to ensure it doesn’t cause unintended discoloration or damage.
When it comes to filling chips, the DIY approach becomes a bit more technical. Specialized artificial marble repair kits are designed for this purpose. These kits typically contain a two-part resin system – a base resin and a hardener – along with color pigments, mixing tools, and sometimes even small applicators or spatulas. The process begins with cleaning the chipped area meticulously. Any loose fragments should be removed. Then, you’ll need to mix the resin components according to the manufacturer’s instructions. This is a critical step; improper mixing can lead to a weak or improperly cured repair. If your artificial marble is colored, you’ll likely need to add pigments to the resin to match the existing color. This can be an art in itself. Start with small amounts of pigment and gradually add more until you achieve a close match. It’s often easier to add more pigment than to remove it, so proceed with caution.
Once mixed and colored, the resin is carefully applied to the chip. The goal is to slightly overfill the void, creating a small mound of material. This is because the resin will likely shrink slightly as it cures. You can use a small spatula or applicator to help shape and level the resin as you apply it. Once the resin has cured according to the manufacturer’s instructions (this can range from a few minutes to several hours), the excess material needs to be carefully removed. This is typically done with a sharp utility knife or a razor blade held at a low angle to shave off the excess resin, aiming to make it flush with the surrounding countertop. Following this, a multi-stage sanding process begins. You’ll start with a finer grit sandpaper (around 400-600 grit) to level the filled area and then progress to progressively finer grits (800, 1000, 1500, 2000 grit and even higher). The key is to blend the repaired area with the surrounding surface, gradually removing the sanding marks from the previous grit. Finally, a polishing compound is used to restore the shine and match the original finish. This part requires patience and a gentle touch.
For those who prefer to leave the more intricate repairs to the experts, professional artificial marble repair services offer a compelling solution. These professionals possess a deep understanding of the material science involved and have access to specialized tools and techniques that go beyond typical DIY kits. They can accurately assess the extent of damage and recommend the most effective repair strategy. For instance, they might use UV-curing resins that harden almost instantaneously under UV light, significantly reducing the time required for repairs. They also often employ more sophisticated color-matching systems, utilizing a wide spectrum of pigments and precise measurement tools to achieve a near-perfect blend with the original countertop, even for patterns with intricate veining or subtle color variations.
Moreover, professional technicians are adept at handling more complex issues like structural damage or large-scale resurfacing. They can fill larger voids, repair cracks, and even re-laminate sections of the countertop if necessary. Their expertise ensures not only a visually seamless repair but also a structurally sound and durable result. The investment in professional repair can often be significantly less than the cost of a full countertop replacement, saving homeowners considerable time, money, and hassle. It’s an environmentally conscious choice as well, diverting waste from landfills and extending the lifespan of existing materials. When considering repair, it’s always wise to get quotes from a few reputable professionals, discuss their methodologies, and view examples of their previous work. This due diligence will help you make an informed decision and ensure you achieve the best possible outcome for your cherished artificial marble surfaces. Ultimately, whether you choose the DIY route or opt for professional expertise, the ability to repair artificial marble is a testament to its clever design and a powerful tool in maintaining the beauty and functionality of your home.


