
The allure of artificial marble lies in its versatility, durability, and the seamless elegance it brings to any space. From gleaming kitchen countertops and sophisticated bathroom vanities to striking wall panels and intricate decorative elements, its ability to mimic natural stone with customizable patterns and colors makes it a designer’s dream. However, the true magic of artificial marble often hinges on its installation – specifically, how those individual pieces come together to create a unified, flawless surface. The key to this seamless integration lies in the adhesive used. Choosing the right bonding agent is not merely a practical necessity; it’s an art form that separates a good installation from a truly exceptional one.
When we talk about bonding artificial marble, we’re essentially discussing the creation of an invisible, yet incredibly strong, union between two pieces of material. This is particularly critical for projects like countertops where a long, continuous expanse is desired, or for intricate patterns where precise alignment is paramount. The “seam” – the line where two pieces meet – can either be a testament to meticulous craftsmanship or a glaring imperfection that detracts from the overall aesthetic. This is where understanding the science and application of adhesives for artificial marble becomes your secret weapon.
The market offers a variety of adhesive options, but for artificial marble, the most effective solutions are typically specialized resins. These aren’t your everyday glues; they are engineered to chemically bond with the specific composition of artificial marble, creating a bond that is not only strong but also resistant to moisture, heat, and daily wear and tear. The two primary categories you’ll encounter are acrylic adhesives and epoxy adhesives. Each has its own set of advantages and applications, and understanding these differences is fundamental to making the right choice.
Acrylic adhesives, often referred to as “solid surface adhesives” or “acrylic glues,” are a popular choice for their excellent bonding properties with acrylic-based solid surfaces, which many artificial marbles are composed of. One of their standout features is their ability to cure quickly, which can significantly speed up the installation process. They are also known for their flexibility once cured, which helps to absorb some of the stress and vibration that a surface might experience over time. This flexibility can prevent cracking, especially in areas subject to thermal expansion and contraction. Furthermore, many acrylic adhesives are designed to be color-matched to the artificial marble itself. This is a game-changer for achieving truly invisible seams. When applied correctly and allowed to cure fully, the adhesive line can become virtually undetectable, as if the surface were carved from a single, monolithic piece. The process of using acrylic adhesives typically involves mixing two components – a resin and a hardener – in precise ratios. This mixture is then applied to the edges of the artificial marble pieces that will be joined. Clamping is crucial here, ensuring the pieces are held firmly in place and in perfect alignment while the adhesive cures. For larger installations, specialized jigs and clamps are often employed to maintain consistent pressure and prevent any shifting.
Epoxy adhesives, on the other hand, offer a different set of strengths. Epoxies are renowned for their exceptional strength and durability, often creating a bond that is even stronger than the material itself. They are known for their rigidity once cured, which can be advantageous in certain structural applications. While some epoxies can be more prone to yellowing over time with UV exposure compared to certain acrylics, many formulations are now developed to resist this. The curing process for epoxies can sometimes be slower than for acrylics, which can be a consideration for time-sensitive projects. However, this slower cure can also provide more working time, allowing for precise adjustments and positioning before the bond sets. Similar to acrylics, epoxies are typically two-part systems that require thorough mixing. They are also excellent for filling small gaps and imperfections, making them a forgiving option for less-than-perfect edge preparations. When considering epoxy for artificial marble, it’s important to select a formulation specifically designed for plastics or composites, ensuring optimal adhesion and longevity.
Beyond these two main categories, you might also encounter polyurethane adhesives. Polyurethanes offer a good balance of strength, flexibility, and water resistance. They can be a good choice for applications where a strong, durable bond is needed, and some formulations can also provide a degree of vibration dampening. However, for the pristine, invisible seams typically desired with artificial marble, acrylics often take the lead due to their superior color-matching capabilities and rapid, clear curing properties.
The choice between acrylic and epoxy often comes down to the specific artificial marble material, the application, and the desired outcome. If your priority is an invisible seam that perfectly matches the color of your artificial marble and you’re working with a standard acrylic-based solid surface, a high-quality color-matched acrylic adhesive is likely your best bet. If you’re dealing with a particularly demanding application requiring extreme strength and rigidity, or if you’re not as concerned with a perfectly invisible seam (though modern epoxies can be very discreet), an epoxy might be considered. Ultimately, consulting the manufacturer’s recommendations for your specific artificial marble product is always the wisest first step. They will often specify the types of adhesives that are proven to work best without compromising the material’s integrity or appearance.
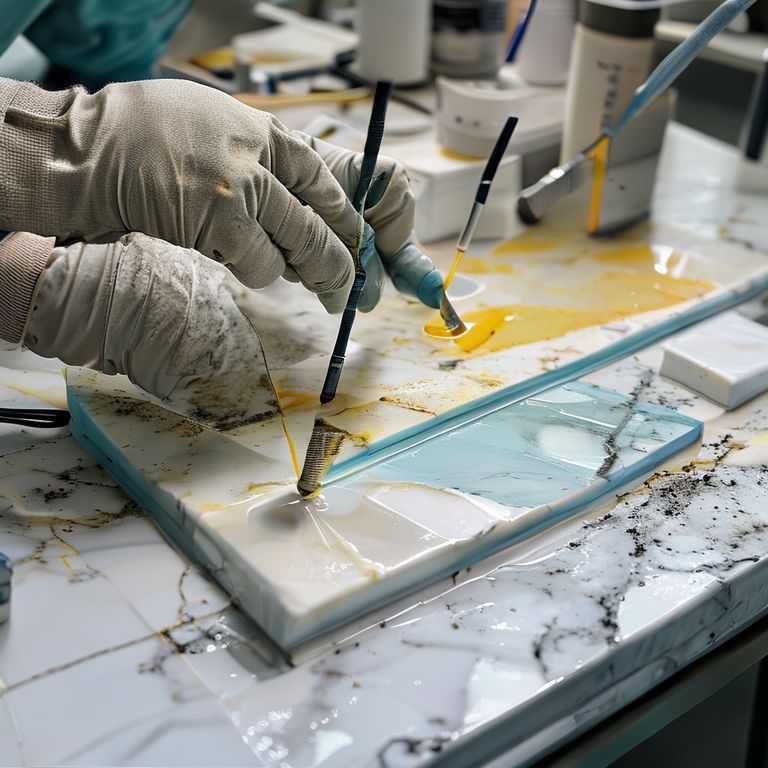
The process of bonding artificial marble isn’t just about slathering on some glue. It involves meticulous preparation, precise application, and patient curing. The edges of the artificial marble pieces must be meticulously cleaned and free of any dust, debris, or residual manufacturing oils. Any contaminants will compromise the bond, leading to potential failure down the line. Similarly, the edges should ideally be precisely cut and beveled according to the adhesive manufacturer’s recommendations. A tight, consistent fit is paramount for achieving a strong and aesthetically pleasing seam. The mixing of two-part adhesives must be done with extreme care, following the manufacturer’s instructions to the letter. Inaccurate ratios can lead to incomplete curing, weakened bonds, or even discoloration. Once mixed, the adhesive is typically applied with a specialized caulking gun or applicator, ensuring an even bead along the bonding surfaces. Clamping is then employed to bring the pieces together with firm, even pressure, ensuring the adhesive spreads thinly and uniformly across the joint. Excess adhesive that squeezes out needs to be carefully managed – for some adhesives, it can be wiped away with a solvent while still wet; for others, it’s best left to cure slightly and then carefully trimmed or scraped. The curing time is a critical phase, and the joined pieces must remain undisturbed for the duration specified by the manufacturer. Rushing this process can lead to a compromised bond that may fail under stress.
Continuing our exploration into the art of bonding artificial marble, let’s delve deeper into the practicalities and nuances that elevate an installation from good to truly professional. We’ve touched upon the primary adhesive types – acrylics and epoxies – and their core strengths. Now, let’s consider the crucial preparatory steps and application techniques that ensure those invisible seams we so desire.
The foundation of any successful bond is immaculate preparation. Before even thinking about uncapping your adhesive, ensure the edges of your artificial marble pieces are pristine. This isn’t just about visual cleanliness; it’s about creating a surface that the adhesive can truly grip. For new installations, this means ensuring precise cuts. Waterjet or CNC routing typically provides the cleanest, most accurate edges, minimizing any gaps that the adhesive would need to fill. If you’re working with pre-cut pieces or need to trim them yourself, invest in high-quality diamond cutting blades designed for solid surfaces. After cutting, gently deburring the edges with a fine-grit abrasive paper can remove any microscopic sharp edges that might interfere with the adhesive spread.
Cleaning is paramount. A thorough wipe-down with a solvent recommended by the adhesive manufacturer – often isopropyl alcohol or a specialized surface cleaner – will remove any dust, oils, or residues. You want a surface that’s chemically receptive to the adhesive. For existing installations or repairs, this cleaning step becomes even more critical to remove any ingrained grime or old sealant.
Mixing the adhesive is where precision truly matters. Most high-performance adhesives for artificial marble are two-part systems. The ratios are usually very specific, and even a slight deviation can lead to a weakened bond, improper curing, or even discoloration over time. It’s vital to follow the manufacturer’s instructions meticulously. Use clean mixing sticks and containers, and ensure you mix thoroughly until the two components are completely homogenous. Many adhesives come with specific mixing instructions, including how long to mix and how to scrape the sides and bottom of the mixing container to ensure all components are incorporated. Some professionals use digital scales for absolute accuracy, especially for critical or large-scale applications.
When it comes to application, think about achieving a consistent, thin, and even layer of adhesive. For creating seamless joints in countertops or large panels, a specialized caulking gun with a fine tip or a custom-made applicator can be invaluable. The goal is to apply the adhesive to one of the bonding surfaces, ensuring it covers the entire edge that will make contact. Avoid applying too much, as this can lead to excessive squeeze-out, which can be difficult to clean and may compromise the aesthetic. For very tight joints, a fine bead is all that’s needed. The adhesive should be applied just before the pieces are brought together to maximize its working time.
Clamping is the unsung hero of a perfect seam. Once the adhesive is applied and the pieces are carefully aligned, firm and even clamping pressure is essential. This pressure forces the two pieces into perfect contact, spreads the adhesive into a thin, uniform layer, and prevents any movement during the curing process. Specialized seam setters, countertop clamps, and vacuum clamps are often used by professionals to achieve this ideal pressure and alignment. For DIY projects, robust bar clamps or pipe clamps can be employed, but care must be taken to distribute the pressure evenly and to protect the surface of the artificial marble from clamp marks using soft pads or blocks of wood. The goal is a snug fit, not a crushing force. The clamps should remain in place for the full curing time recommended by the adhesive manufacturer.
Managing squeeze-out is an art in itself. For acrylic adhesives, especially those designed for invisible seams, it’s often best to let the squeeze-out partially cure – to a rubbery consistency – before carefully trimming it away with a sharp razor blade or a specialized scraping tool. This prevents smearing and creates a cleaner line. For some epoxies, it might be possible to wipe away excess with a solvent while still wet, but always test this on a scrap piece first to ensure it doesn’t mar the surface. The key is to be patient and methodical. Trying to rush the removal of semi-cured adhesive can lead to a messier result.
The curing process is non-negotiable. Artificial marble projects are often investments, and a compromised seam can be a costly and frustrating issue to rectify. Adhesives require time to reach their full strength. While some acrylics might achieve handling strength within an hour or two, full cure can take 24 hours or more. Epoxies can often have longer full cure times. Resist the temptation to stress the joint prematurely. Avoid placing heavy objects on newly bonded countertops, or leaning on newly installed panels. Patience here pays dividends in the long run, ensuring a durable and aesthetically pleasing finish.
Beyond standard fabrication, adhesives also play a critical role in repairing artificial marble. Chips, cracks, and scratches can often be mended with specialized adhesives. For small chips, a color-matched acrylic adhesive can be carefully applied, built up in layers if necessary, and then carefully shaped and polished once cured. For larger cracks or structural repairs, a stronger epoxy might be more suitable. The process of repair often mirrors fabrication: meticulous cleaning, precise application, and careful curing. For polishing repaired areas, fine-grit sandpaper, polishing compounds, and sometimes even heat guns (used with extreme caution and expertise) are employed to blend the repair seamlessly with the surrounding material.
Ultimately, achieving those coveted seamless surfaces with artificial marble is a combination of choosing the right tool for the job – the adhesive – and mastering the techniques of preparation, application, and curing. It’s a process that demands attention to detail, a steady hand, and a commitment to quality. When done correctly, the result is not just a functional surface, but a work of art, where the material itself seems to flow uninterrupted, a testament to the invisible power of a well-chosen and expertly applied adhesive.


