Is changing your kitchen countertop a daunting task? Fear not! Our comprehensive guide breaks down the process into easy-to-follow steps. Learn about the various types of countertops, the tools you’ll need, and tips to ensure a seamless transition. Whether you’re a DIY enthusiast or simply curious, discover how to elevate your kitchen’s aesthetics and functionality with minimal stress.

kitchen countertop replacement, DIY kitchen renovation, countertop types, countertop installation, kitchen makeover, countertop tools, kitchen design, home improvement, countertop troubleshooting
The Hassle-Free Guide to Kitchen Countertop Replacement
When it comes to kitchen remodeling, one of the most impactful yet often daunting tasks is replacing the kitchen countertop. Whether it’s due to outdated materials, wear and tear, or simply a desire for a fresh look, updating your kitchen countertops can significantly enhance your kitchen’s aesthetics and functionality. Here’s a detailed, step-by-step guide to ensure your kitchen countertop replacement is as hassle-free as possible.
Understanding the Types of Countertops
Choosing the right countertop material is the first and most crucial step in the replacement process. Here are some of the most popular types:

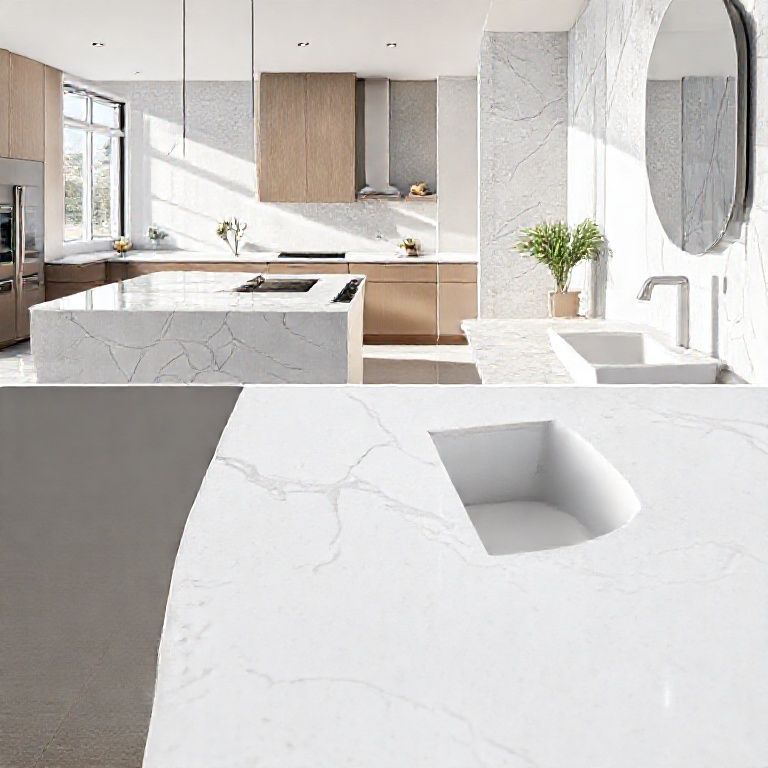
Quartz: Known for its durability and resistance to heat, stains, and scratches, quartz countertops are a top choice for many homeowners. They come in a variety of colors and patterns, offering versatility in design.
Granite: Granite countertops are renowned for their natural beauty and strength. They come in an array of colors and patterns, providing a unique and elegant look. However, they are heavier and can be more challenging to install.
Slate: Slate countertops offer a rustic, natural look and are highly durable. They are typically more affordable than granite but require sealing to protect against stains.

Marble: Marble countertops are luxurious and elegant but can be more prone to staining and require regular sealing. They are also quite heavy.
Corian: Corian is a type of synthetic stone that is highly durable, stain-resistant, and easy to clean. It is versatile and comes in many colors.
Gathering the Tools and Materials
To replace your kitchen countertop, you’ll need a variety of tools and materials. Here’s a comprehensive list to get you started:

Utility Knife and Scraper: For cutting and removing old caulk and adhesive. Hammer and Claw Hammer: Useful for prying up old countertops, especially if they are made of materials like slate or marble. Chisels: To break up and remove stubborn sections of the old countertop. Ladder: To reach high areas if you need to remove countertops from upper cabinets. Measuring Tape: To accurately measure the space for your new countertop. Level: To ensure your new countertop is installed straight. Countertop Material: Choose the material that best suits your needs and budget. Adhesive: For attaching the new countertop, especially if it’s a lighter material like quartz or Corian. Construction Adhesive: If you’re replacing a heavier countertop, this will provide extra support. Sandpaper and Cleaning Supplies: To clean the surface where the new countertop will be installed.
Preparing the Space
Before you begin the actual installation, it’s important to prepare the space:
Clear the Area: Remove all items from the countertop area, including appliances, utensils, and any other decor. This will give you a clear workspace and prevent accidental damage.
Protect Surrounding Areas: Use drop cloths or plastic sheeting to protect the surrounding surfaces from dust, debris, and any potential spills during the installation process.
Turn Off Utilities: If you’re working with gas or electrical appliances, make sure to turn off the utilities to avoid any potential hazards.
Removing the Old Countertop
Removing the old countertop is a critical step that requires careful attention:
Score the Caulk: Use a utility knife to score the caulk line along the edges of the countertop. This will help in prying off the old countertop.
Pry Up the Countertop: Using a crowbar or a pry bar, gently pry up the countertop. Start from the edges and work your way towards the center. For heavier materials like granite or marble, a hammer and chisel may be necessary.
Remove Adhesive Residue: Once the old countertop is removed, use a scraper and adhesive remover to clean any remaining adhesive or caulk. Make sure the surface is smooth and clean for the installation of the new countertop.
Check for Damage: Inspect the cabinetry and walls for any damage caused during the removal process. Repair any damaged areas before proceeding.
Installing the New Countertop
Now comes the exciting part – installing your new countertop:
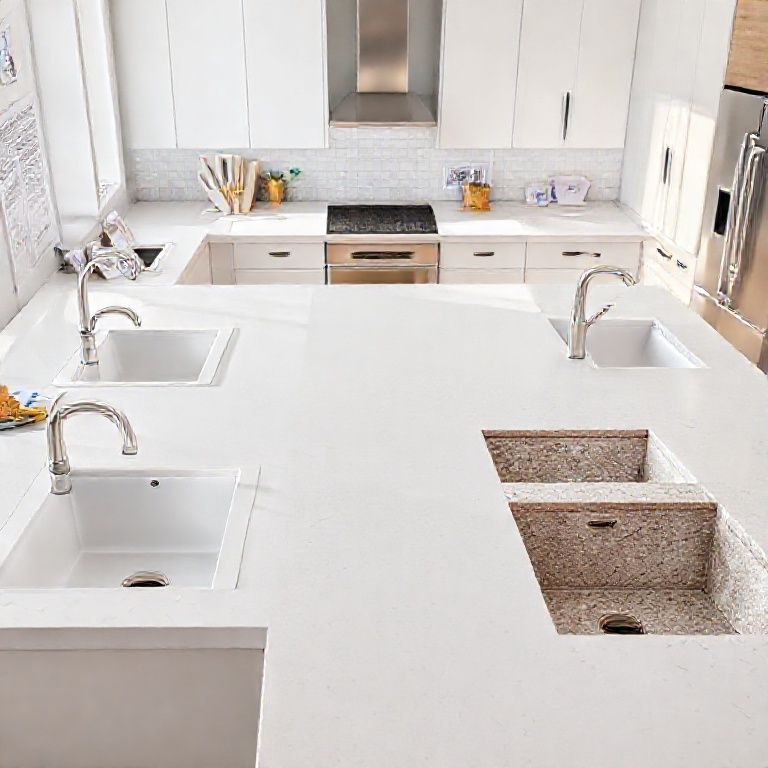
Measure and Cut: Measure the space where the new countertop will fit. Use a saw to cut the countertop to the correct size. Make sure to leave a small gap (about 1/8 inch) around the edges for caulking.
Apply Adhesive: If your new countertop is lightweight, apply a generous amount of adhesive along the edges of the cabinets where the countertop will sit. For heavier materials, use construction adhesive for extra support.
Position the Countertop: Carefully place the new countertop into position. Use a level to ensure it’s straight and make any necessary adjustments. For extra stability, consider using countertop clips or brackets.
Clamp and Let Set: If you used adhesive, clamp the countertop in place and let it set for the recommended time as per the adhesive manufacturer’s instructions.
Caulk the Edges: Once the countertop is securely in place, use a caulk gun to apply caulk along the edges. Smooth the caulk with a damp finger to remove any bubbles and ensure a seamless finish.
Clean Up: Remove any drop cloths and clean up the workspace. Inspect the countertop to ensure everything looks perfect and make any touch-ups if necessary.
Finishing Touches
After the installation, there are a few finishing touches to ensure your new countertop looks and functions perfectly:
Seal the Countertop: Depending on the material, you may need to seal the countertop. For natural stone like granite or slate, apply a sealing agent to protect against stains and spills. Follow the manufacturer’s instructions for the best results.
Install Hardware: Add any necessary hardware such as cabinet knobs, handles, and drawer slides. Make sure everything is securely attached.
Final Inspection: Take a final look at your new countertop. Check for any imperfections, ensure everything is level, and make any adjustments as needed.
Enjoy Your New Space: Now that your kitchen countertop is replaced, it’s time to enjoy your updated space. Rearrange your kitchen items and start using your new, beautiful countertop.
Conclusion
Replacing a kitchen countertop doesn’t have to be a daunting task. With the right tools, materials, and a bit of patience, you can transform your kitchen into a stylish and functional space. By understanding the types of countertops, preparing the space, and following a detailed installation process, you’ll be able to enjoy your new countertop with minimal hassle. Remember, each step brings you closer to a kitchen that reflects your style and meets your needs.
The Hassle-Free Guide to Kitchen Countertop Replacement (Continued)
Continuing from where we left off, let’s delve deeper into the specifics of kitchen countertop replacement. While the initial steps are foundational, the nuances and finer details often make the difference between a smooth installation and a project fraught with complications. Here’s everything you need to know to ensure your kitchen countertop replacement is not just a success, but a masterpiece.
Detailed Planning and Design
Before diving into the physical aspects of countertop replacement, it’s essential to have a detailed plan:
Define Your Goals: Determine why you want to replace your countertop. Is it for aesthetics, durability, functionality, or a combination of reasons? Understanding your goals will help you choose the right material and design.
Budget Planning: Set a realistic budget that includes not only the cost of the countertop material but also any additional costs such as installation, tools, and potential renovations around the kitchen. Factor in a little extra for unexpected expenses.
Design Inspiration: Look for inspiration in design magazines, online platforms like Pinterest, or consult with a professional designer. Sketch out your ideas and consider the flow of your kitchen to ensure the new countertop complements the space.
Material Research: Research different materials thoroughly. Look at reviews, compare costs, and consider the maintenance requirements. For instance, granite requires sealing to prevent staining, whereas quartz and Corian are more low-maintenance.
Professional Help vs. DIY
Deciding whether to tackle the replacement yourself or hire a professional is a crucial decision:
DIY Advantages: If you’re handy and enjoy home improvement projects, DIY can be cost-effective. You’ll save on labor costs and often have more control over the design and process.
Professional Services: Hiring a professional can ensure a flawless installation, especially if you’re working with heavy or intricate materials. Professionals have the expertise to handle any complications that arise and can offer advice on the best materials for your specific kitchen.
Hybrid Approach: Sometimes, a hybrid approach works best. You can handle the preparation and minor tasks while hiring a professional for the installation### Choosing the Right Tools and Materials
Selecting the right tools and materials is crucial for a successful countertop replacement. Here’s an in-depth look at what you’ll need:
Tools for Removal: Utility Knife: Essential for cutting caulk and adhesive. Pry Bar: For gently prying up the old countertop without damaging the cabinets. Hammer and Chisel: Useful for breaking up and removing stubborn sections, especially for heavier materials. Ladder: To reach high areas if you need to remove countertops from upper cabinets. Score Board: To make precise cuts on the old countertop. Tools for Installation: Measuring Tape: To accurately measure the space for your new countertop. Level: To ensure the new countertop is installed straight. Saw: Depending on the material, you might need a tile saw, circular saw, or another appropriate cutting tool. Caulk Gun: For applying caulk along the edges of the countertop. Sandpaper: For smoothing out any rough edges or surfaces. Materials for Installation: Adhesive: For attaching the new countertop, especially if it’s lightweight. Use construction adhesive for heavier materials. Construction Clips or Brackets: To provide additional support for the countertop. Sealant: Depending on the material, you may need a specific sealant to protect the countertop.
Detailed Installation Process
Let’s dive deeper into the installation process for different types of countertops:
Quartz Countertops: Measurement and Cutting: Quartz countertops often come in large sheets. Measure carefully and use a tile saw to cut them to size. Adhesion: Apply a generous amount of adhesive along the edges of the cabinets. Let it set according to the manufacturer’s instructions. Positioning: Carefully place the countertop into position and use a level to ensure it’s straight. Clamping: Use countertop clips or brackets to hold the countertop in place while the adhesive sets. Caulking: Once the adhesive has set, apply caulk along the edges and smooth it with a damp finger. Granite Countertops: Measurement and Cutting: Granite can be more challenging to cut due to its hardness. Use a wet saw with a diamond blade to make clean cuts. Adhesion: For granite, use construction adhesive for added support. Positioning: Carefully place the granite countertop into position and use a level to ensure it’s straight. Clamping: Use heavy-duty clips or brackets to secure the countertop while the adhesive sets. Caulking: Once the adhesive has set, apply caulk along the edges and smooth it with a damp finger. Corian Countertops: Measurement and Cutting: Corian is relatively easy to cut with a utility knife or saw. Adhesion: Apply adhesive along the edges of the cabinets and let it set according to the manufacturer’s instructions. Positioning: Carefully place the Corian countertop into position and use a level to ensure it’s straight. Clamping: Use countertop clips to hold the countertop in place while the adhesive sets. Caulking: Once the adhesive has set, apply caulk along the edges and smooth it with a damp finger.
Finishing Touches
Once your new countertop is installed, there are a few finishing touches to ensure everything looks perfect:
Sealing the Countertop: Depending on the material, you may need to seal the countertop. For natural stone like granite or slate, apply a sealing agent to protect against stains and spills. Follow the manufacturer’s instructions for the best results. For quartz and Corian, check the manufacturer’s guidelines for sealing or polishing. Installing Hardware: Add any necessary hardware such as cabinet knobs, handles, and drawer slides. Make sure everything is securely attached. Final Inspection: Take a final look at your new countertop. Check for any imperfections, ensure everything is level, and make any adjustments as needed. Enjoy Your New Space: Now that your kitchen countertop is replaced, it’s time to enjoy your updated space. Rearrange your kitchen items and start using your new, beautiful countertop.
Conclusion
Replacing a kitchen countertop is a rewarding home improvement project that can significantly enhance the look and functionality of your kitchen. By planning thoroughly, choosing the right tools and materials, and following a detailed installation process, you can achieve a seamless and professional-looking result. Whether you choose to tackle the project yourself or hire a professional, the key is to take your time and ensure each step is done carefully for the best outcome.
By following this comprehensive guide, you’ll be well on your way to a beautiful and functional kitchen countertop that you’ll be proud of for years to come. Happy remodeling!