Discover the ultimate guide to repairing a cracked kitchen countertop. From identifying the type of countertop to the detailed step-by-step repair process, this comprehensive guide ensures your kitchen looks pristine and professional without professional help. Dive into the most effective methods and materials to restore your countertop to its former glory.
kitchen countertop repair, cracked countertop, repair kitchen surface, DIY countertop fix, kitchen renovation, countertop maintenance, fix kitchen table, repair kitchen worktop, kitchen counter fix, countertop restoration
The Ultimate Guide to Repairing a Cracked Kitchen Countertop: Step-by-Step Instructions
Introduction
A cracked kitchen countertop can be a significant concern for any homeowner. Not only does it affect the aesthetics of your kitchen, but it can also pose a safety hazard. However, with the right materials and a bit of patience, you can repair a cracked countertop yourself. This guide will walk you through the process, ensuring your kitchen countertop looks as good as new.
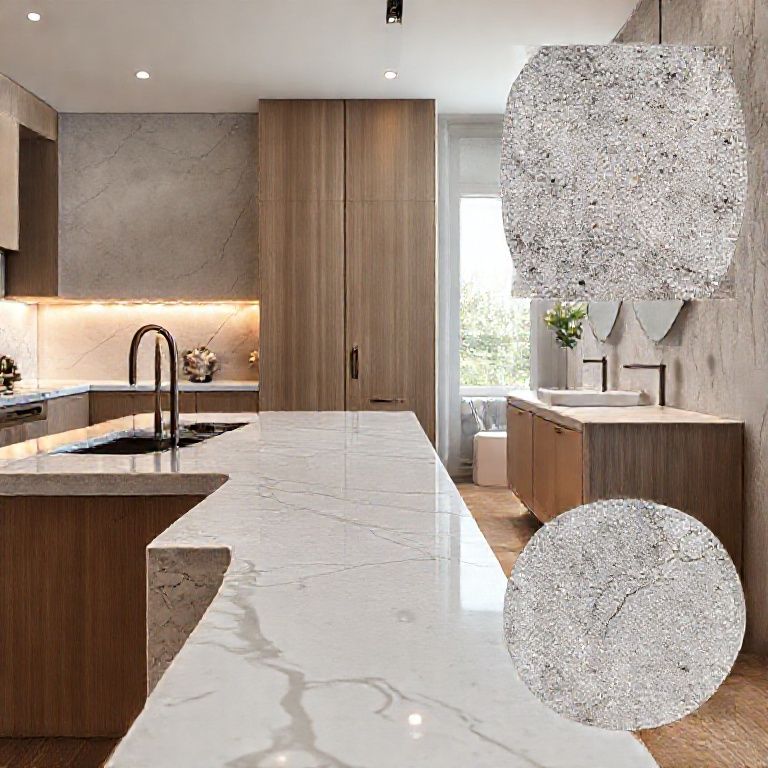
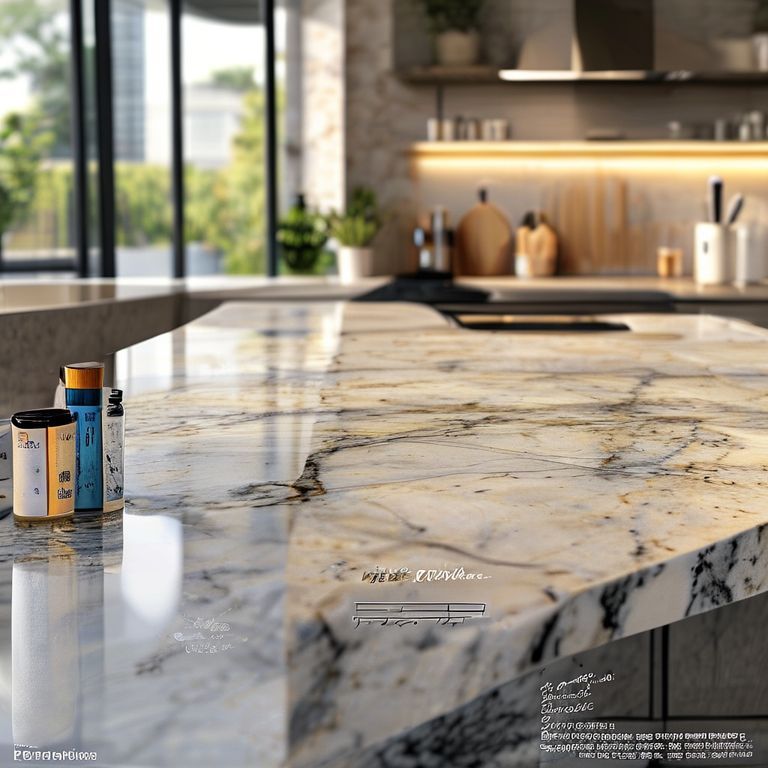
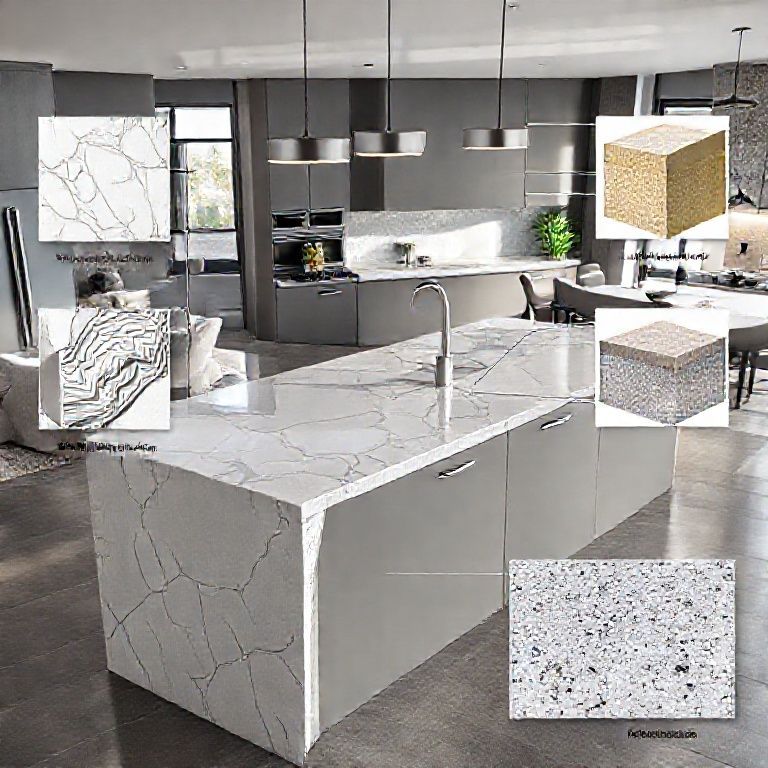
Identifying the Type of Countertop
Before you begin the repair process, it’s crucial to identify the type of countertop you have. Different materials require different repair methods. Here are the common types of kitchen countertops and their respective repair techniques:
Granite Repair Method: Requires professional assistance due to the material’s hardness and brittleness. Quartz Repair Method: Can often be repaired with a specific epoxy designed for quartz. Marble Repair Method: Requires a special marble repair kit that matches the stone’s color and texture. Slate Repair Method: Typically needs professional intervention because of the material’s natural fractures. Concrete Repair Method: Can be repaired with a concrete patching compound and a matching color hardener. Laminate Repair Method: Can often be fixed by applying a laminate repair kit or covering the crack with a laminate overlay. Wood Repair Method: Can be fixed with wood filler and sanding for a seamless finish.
Tools and Materials Needed
Regardless of the countertop type, some basic tools and materials are necessary:
Safety goggles Gloves Dust mask Scraper or putty knife Countertop repair kit (specific to your countertop type) Cleaning cloth Paintbrush or roller (if needed) Sandpaper (if needed) Clear sealant (optional, for finishing)
Step-by-Step Repair Process
Preparation Safety First: Always wear safety goggles, gloves, and a dust mask to protect yourself from any dust or chemicals. Clean the Area: Thoroughly clean the cracked area with a mild detergent and a cloth. Ensure it is completely dry before proceeding. Assess the Damage: Examine the crack to determine its depth and width. This will help you select the appropriate repair materials. Removing the Existing Repair (if any) If there are any existing repairs, use a scraper or putty knife to remove them. This ensures a fresh surface for the new repair material. Repairing the Crack Matching the Color: Most countertop repair kits come with color-matched epoxy or patching compounds. Follow the manufacturer’s instructions for application. Applying the Repair Material: Carefully fill the crack with the repair material, making sure it goes below the surface to create a strong bond. Use a putty knife or a similar tool for precision. Smoothing the Surface: Once the repair material has been applied, use a scraper or a similar tool to smooth the surface to match the surrounding countertop. Allowing to Dry Allow the repair material to dry completely as per the instructions provided by the manufacturer. This usually takes several hours to a full day. Sanding and Finishing If necessary, lightly sand the repaired area to ensure it is smooth and blends seamlessly with the rest of the countertop. Use fine-grit sandpaper for a gentle finish. Apply a clear sealant to protect the repaired area and enhance the countertop’s durability. This step is optional but highly recommended for longevity.

Tips and Tricks
Match the Color Precisely: Accurate color matching is crucial for a seamless repair. Use color charts or sample kits provided by the repair kit manufacturer. Work in a Well-Ventilated Area: Ensure good ventilation while working with chemicals to avoid inhaling fumes. Practice on a Small Area First: If you’re unsure about the repair process, practice on a small, inconspicuous area first to get a feel for the materials and techniques.
Conclusion
Repairing a cracked kitchen countertop does not have to be a daunting task. With the right tools, materials, and a bit of patience, you can restore your kitchen countertop to its former glory. Whether it’s granite, quartz, marble, or any other type, following the proper steps will ensure a professional-looking repair that enhances both the aesthetics and functionality of your kitchen.
The Ultimate Guide to Repairing a Cracked Kitchen Countertop: Step-by-Step Instructions (Continued)
Introduction (Continued)
In the previous section, we covered the basics of identifying your countertop type and provided an overview of the repair process. Now, let’s delve deeper into the specific steps for repairing different types of kitchen countertops, ensuring a flawless finish.
Repairing Granite Countertops
Granite is a durable and beautiful countertop material but can be challenging to repair due to its hardness. Here’s how to fix a crack in granite:
Preparation Clean the Area: Thoroughly clean the cracked area using a granite-safe cleaner to remove any dirt, grease, or residue. Dry Completely: Ensure the area is completely dry before proceeding. Selecting the Right Repair Kit Use a granite repair kit that includes a color-matched epoxy and a polishing compound. These kits are available at most hardware stores. Repairing the Crack Apply the Epoxy: Mix the epoxy according to the instructions on the kit and apply it to the crack using a putty knife or a similar tool. Make sure the epoxy goes below the surface of the crack for a strong bond. Smooth the Surface: Use a scraper to smooth the epoxy so that it blends seamlessly with the countertop. Allowing to Dry Let the epoxy dry completely as per the manufacturer’s instructions, which could take several hours. Polishing Once dry, use the polishing compound from the kit to buff the repaired area. This will give the repair a polished, seamless look.
Repairing Quartz Countertops
Quartz is a popular choice for its durability and ease of maintenance. Here’s how to repair a crack in quartz:
Preparation Clean the Area: Clean the cracked area thoroughly using a damp cloth and a mild detergent. Dry it completely. Selecting the Right Repair Kit Use a quartz repair kit that includes color-matched epoxy and a polishing compound. These kits are available at most hardware stores. Repairing the Crack Apply the Epoxy: Mix the epoxy according to the instructions on the kit and apply it to the crack using a putty knife or a similar tool. Ensure the epoxy goes below the surface of the crack. Smooth the Surface: Scrape the epoxy to smooth it out so it blends seamlessly with the countertop. Allowing to Dry Let the epoxy dry completely as per the manufacturer’s instructions, which could take several hours. Polishing Once dry, use the polishing compound from the kit to buff the repaired area. This will give the repair a polished, seamless look.
Repairing Marble Countertops
Marble is a beautiful but delicate material that requires special care. Here’s how to repair a crack in marble:
Preparation Clean the Area: Clean the cracked area thoroughly using a marble-safe cleaner to remove any dirt, grease, or residue. Dry it completely. Selecting the Right Repair Kit Use a marble repair kit that includes a color-matched epoxy and a polishing compound. These kits are available at most hardware stores. Repairing the Crack Apply the Epoxy: Mix the epoxy according to the instructions on the kit and apply it to the crack using a putty knife or a similar tool. Make sure the epoxy goes below the surface of the crack for a strong bond. Smooth the Surface: Use a scraper to smooth the epoxy so that it blends seamlessly with the countertop. Allowing to Dry Let the epoxy dry completely as per the manufacturer’s instructions, which could take several hours. Polishing Once dry, use the polishing compound from the kit to buff the repaired area. This will give the repair a polished, seamless look.
Repairing Slate Countertops
Slate countertops are naturally fractured and can be challenging to repair. Here’s how to fix a crack in slate:
Preparation Clean the Area: Clean the cracked area thoroughly using继续介绍修补裂开的厨房台面的方法:
修复 Slate(石板)台面
准备工作: 清洁区域:用专门的石板清洁剂彻底清洁裂缝区域,确保没有污垢、油渍或任何其他杂质。干燥后,用干布擦干。 选择修复材料: 使用与石板颜色匹配的修复胶和填充剂。这些材料通常可以在建材店购买到。 修复裂缝: 应用修复胶:将修复胶均匀涂抹在裂缝处,确保其渗入裂缝内部。
这可以帮助修复裂缝并增加强度。 填充裂缝:使用专用填充剂将裂缝填满,确保填充物与台面颜色一致。用小的胶刀或刮刀将填充剂均匀涂抹。 干燥时间: 根据制造商的说明,让修复材料完全干燥。这通常需要几小时到一天的时间。 打磨和抛光: 用细砂纸轻轻打磨填充的区域,使其平滑并与台面融为一体。
抛光石板以恢复其自然光泽。
修复木质台面
准备工作: 清洁区域:用温和的肥皂水清洁裂缝区域,确保没有污垢和油渍。用干布擦干。 选择修复材料: 使用木胶和木填料,确保其颜色与木材相匹配。可以在五金店或家具店购买。 修复裂缝: 应用木胶:在裂缝处涂抹木胶,确保其充分渗入裂缝内部。 填充裂缝:使用木填料将裂缝填满,并用木杠杆或类似工具压实。
等待填料干燥。 打磨和抛光: 用细砂纸轻轻打磨填充区域,使其平滑并与台面融为一体。最后使用木抛光剂涂抹,以恢复木材的光泽。
修复瓷砖台面
准备工作: 清洁区域:用温和的清洁剂和水清洁裂缝区域,确保没有污垢和油渍。用干布擦干。 选择修复材料: 使用专用的瓷砖修复胶和填充剂。这些材料通常可以在建材店购买到。 修复裂缝: 应用修复胶:将修复胶均匀涂抹在裂缝处,确保其渗入裂缝内部。 填充裂缝:使用瓷砖填充剂将裂缝填满,并用小的胶刀或刮刀将填充剂均匀涂抹。
干燥时间: 根据制造商的说明,让修复材料完全干燥。这通常需要几小时到一天的时间。 打磨和抛光: 用细砂纸轻轻打磨填充的区域,使其平滑并与台面融为一体。如果需要,使用瓷砖抛光剂进行抛光。
总结
修复裂开的厨房台面需要一些耐心和细致的工作,但通过正确的方法和材料,你可以让台面看起来像新的一样。无论你使用的是什么材料,始终确保清洁和干燥,并按照制造商的说明进行操作。如果裂缝过大或损坏严重,考虑寻求专业帮助可能是更好的选择。