Identifying and Preparing for Repair
Introduction to Artificial Stone Countertop Cracks
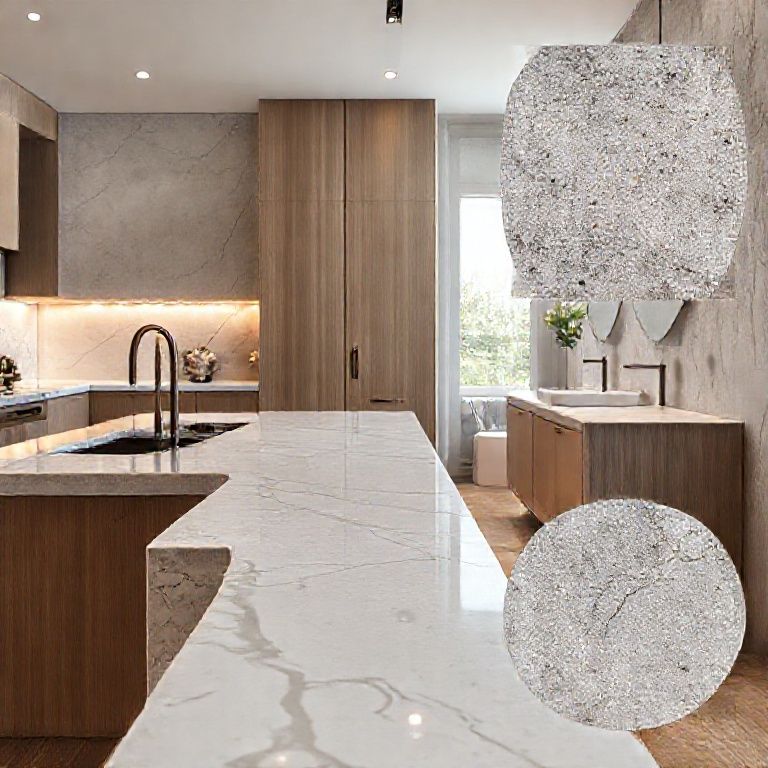
Artificial stone countertops are known for their durability and sleek appearance, but they can still develop cracks over time, especially if subjected to heavy objects, impacts, or improper installation. Addressing these cracks promptly is essential to prevent further damage and maintain the aesthetic appeal of your countertop. This guide will walk you through the entire repair process in an easy-to-follow manner, ensuring your countertop looks as good as new.

Step 1: Identifying the Crack
The first step in repairing a crack in an artificial stone countertop is to identify the nature and extent of the damage. Cracks can vary in size and depth, so a thorough examination is crucial. Look for:
Surface Cracks: Small, superficial cracks on the surface that may not penetrate deeply. Deep Cracks: Larger cracks that go deep into the stone, potentially affecting structural integrity. Crack Patterns: Linear or spider-web patterns that indicate the direction and magnitude of the stress.
Take note of the location and length of the crack, as this information will guide the repair process.

Step 2: Cleaning the Area
Before initiating any repair, ensure the cracked area is clean and dry. Artificial stone surfaces can be susceptible to stains and moisture, which can complicate the repair process. Here’s how to clean effectively:
Dust and Debris Removal: Use a soft cloth or brush to remove any dust, debris, or loose particles from the crack. Deep Cleaning: Apply a mild stone cleaner or a mixture of water and dish soap to the entire countertop, focusing on the cracked area. Use a soft cloth to wipe it clean, ensuring no residue remains. Drying: Allow the area to air dry completely. Moisture can interfere with the repair material’s adhesion.
Step 3: Preparing the Crack
Once the area is clean and dry, it’s time to prepare the crack for repair. This step involves:
Reinforcing the Crack: If the crack is deep, use a utility knife to gently widen it slightly at the deepest point. This step helps the repair material penetrate better and ensures a more secure bond. Smoothing the Edges: Carefully smooth out the edges of the crack with a fine-grit sandpaper. This step ensures a clean surface for the repair material to adhere to.

Step 4: Choosing the Right Repair Material
Selecting the appropriate repair material is crucial for a successful fix. The most commonly used materials for repairing artificial stone countertops include:
Epoxy Resin: A two-part resin that provides a durable, long-lasting repair. It’s ideal for deep cracks and offers excellent adhesion to stone surfaces. Polyurethane Filler: A versatile filler that is easy to apply and can be colored to match the countertop. It’s suitable for both small and medium-sized cracks. Stone Repair Kits: These kits often include pre-mixed repair compounds and tools, making the process straightforward even for beginners.
Conclusion of Part 1
Identifying, preparing, and selecting the right materials are crucial first steps in repairing cracks in artificial stone countertops. Ensuring the crack is clean and properly prepared will make the repair process smoother and more effective. In the next part, we’ll dive into the application techniques and tools needed to complete the repair. Stay tuned for more detailed instructions on bringing your countertop back to its former glory.

Applying the Repair Material
Introduction to Repair Techniques
With the preparation phase complete, it’s time to apply the chosen repair material. Whether you’re using epoxy resin, polyurethane filler, or a stone repair kit, the application process involves precision and patience. This guide will walk you through each step, ensuring a seamless and professional finish.
Step 1: Mixing the Epoxy Resin
If you’ve chosen epoxy resin for your repair, the first step is to mix the two parts correctly. Epoxy resin typically consists of a resin and a hardener. Here’s how to mix it:
Proportions: Follow the manufacturer’s instructions for the correct ratio of resin to hardener. Typically, the ratio is 1:1. Mixing: Use a mixing rod or a disposable stir stick to thoroughly combine the two components. Mix until the resin and hardener are completely blended and free of air bubbles.
Step 2: Applying the Epoxy Resin
Applying epoxy resin requires careful technique to ensure a smooth and clean finish. Here’s how to do it:
Tool Selection: Use a putty knife or a small spatula to apply the resin. Ensure the tool is clean and free of debris. Application: Apply the resin along the crack, pressing it into the crack and smoothing it out with the tool. Make sure the resin fills the crack completely and extends a little beyond the edges to ensure a strong bond. Smoothing: Use a clean cloth or a plastic scraper to smooth the surface of the resin, removing any excess and creating a neat finish.
Step 3: Using Polyurethane Filler
Polyurethane filler is another excellent option for repairing cracks in artificial stone countertops. Here’s how to apply it:
Color Matching: If the crack is large and the filler needs to be colored to match the countertop, use a colorant included in the kit or a separate stone colorant. Application: Use a putty knife or a small spatula to apply the filler along the crack, pressing it into the crack and smoothing it out. Ensure the filler fills the crack completely and extends slightly beyond the edges. Smoothing: Use a clean cloth or a plastic scraper to smooth the surface of the filler, removing any excess and creating a neat finish.
Step 4: Curing the Repair Material
Once the repair material is applied, it needs time to cure properly. Curing ensures the material hardens and becomes durable. Here’s how to cure the repair:
Epoxy Resin Curing: Follow the manufacturer’s instructions for the curing time. Epoxy resin typically takes several hours to cure completely. During this time, avoid touching or disturbing the repaired area. Polyurethane Filler Curing: Polyurethane filler usually cures within a few hours. Again, avoid touching or disturbing the repaired area during the curing process.
Step 5: Finishing Touches
After the repair material has cured, it’s time to finalize the repair and ensure a seamless look:
Sanding: For epoxy resin repairs, use a fine-grit sandpaper to smooth the cured material. Sand gently until the surface is even with the countertop. Polishing: For both epoxy resin and polyurethane filler, a polishing step is essential. Use a soft cloth or a polishing pad to buff the repaired area, ensuring it blends seamlessly with the rest of the countertop. Sealing: To protect the repaired area and enhance the durability of the countertop, consider applying a stone countertop sealant. This step adds an extra layer of protection against stains and scratches.
Conclusion of Part 2
Applying the repair material and completing the finishing touches are crucial for ensuring a durable and aesthetically pleasing repair. By following these detailed steps, you can effectively restore your artificial stone countertop, making it look as good as new. Remember, patience and precision are key to a successful repair. With this comprehensive guide, you now have all the knowledge you need to tackle any crack in your artificial stone countertop. Enjoy your revitalized kitchen or bathroom space!
By following this detailed and easy-to-understand guide, you can repair cracks in your artificial stone countertop effectively and restore its original beauty. Whether you opt for epoxy resin or polyurethane filler, these steps will ensure a professional-looking finish. Happy repairing!