Understanding and Preparing for Repair
Introduction
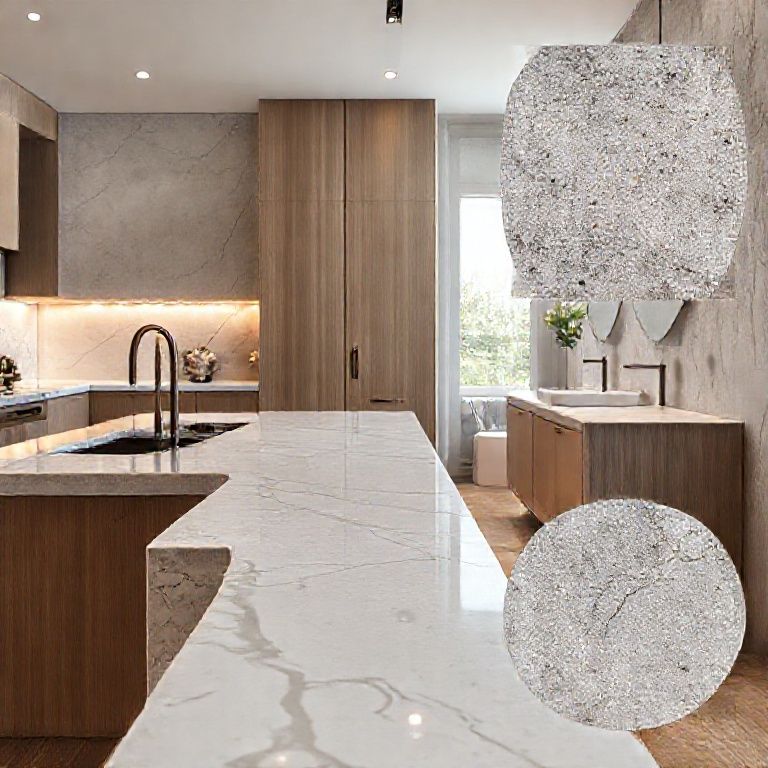
Cracks in artificial stone countertops can be a significant concern for homeowners and restaurateurs alike. These surfaces are known for their durability and aesthetic appeal, but even the best materials can develop cracks over time. Whether from heavy objects, wear and tear, or manufacturing defects, addressing these cracks promptly can prevent further damage and maintain the surface’s integrity. In this part of our guide, we’ll delve into identifying the type of crack and preparing your countertop for repair.

Identifying the Type of Crack
The first step in repairing cracks in artificial stone countertops is to identify the type of crack. There are several types of cracks, each requiring a different approach:
Surface Cracks: These are minor cracks that affect only the surface layer of the stone. They can often be repaired with a simple filling material.
Deep Cracks: These cracks penetrate deeper into the stone and may require more extensive repair methods, including re-cutting and re-polishing.

Stress Cracks: These occur due to stress and may not be visible at first but can expand over time. Identifying these early is crucial for preventing further damage.
Materials and Tools Needed
Before starting the repair process, ensure you have the following materials and tools:
Epoxy Resin: A strong, flexible material that can fill deep cracks. Silicone Sealant: For sealing surface cracks and small gaps. Diamond Tools: For cutting and smoothing out larger cracks. Polishing Pads and Compounds: To restore the surface after repair. Mixing Tools: Spatulas and small containers for mixing resin. Safety Gear: Gloves, safety glasses, and a dust mask.
Preparation Steps
Clean the Area: Thoroughly clean the cracked area with a mild detergent and water. Remove any dirt, grease, or debris that might interfere with the repair material’s adhesion.

Dry the Surface: Ensure the area is completely dry before proceeding. Moisture can weaken the repair.
Assess the Crack: Measure the length and depth of the crack. This will help you determine the appropriate repair method and materials needed.
Safety First: Put on your safety gear to protect yourself from dust and chemicals during the repair process.

Beginning the Repair
Once you’ve identified the type of crack, gathered your materials, and prepared the surface, you’re ready to begin the repair process. For minor surface cracks, you can start with a silicone sealant. For deeper cracks, epoxy resin will be more effective.
Conclusion
Repairing cracks in artificial stone countertops requires careful identification of the crack type, proper preparation of the surface, and the right materials and tools. By following these steps, you can restore your countertop to its original beauty and extend its lifespan. In the next part of our guide, we’ll dive deeper into the repair techniques for different types of cracks and provide a detailed video demonstration.
Repair Techniques and Finishing Touches
Introduction
Welcome back to our comprehensive video guide on repairing cracks in artificial stone countertops. In this second part, we’ll delve into the repair techniques for different types of cracks and provide a detailed demonstration of the process. Whether you’re dealing with minor surface cracks or more extensive damage, this guide will equip you with the knowledge to achieve a professional finish.
Repairing Minor Surface Cracks
For minor surface cracks, a silicone sealant is often sufficient. Here’s how to proceed:
Select the Right Sealant: Choose a high-quality, flexible silicone sealant that matches the color of your countertop.
Prepare the Crack: Use a fine-grit sandpaper to clean and slightly roughen the edges of the crack. This will help the sealant adhere better.
Apply the Sealant: Using a caulking gun, apply the sealant into the crack. Smooth it out with a caulking tool or your finger, ensuring it fills the crack completely.
Cure the Sealant: Allow the sealant to cure as per the manufacturer’s instructions. This usually takes a few hours to a day, depending on the product.
Final Touches: Once cured, clean off any excess sealant with a damp cloth.
Repairing Deeper Cracks with Epoxy Resin
For deeper cracks, epoxy resin provides a more robust solution. Follow these steps for effective repair:
Mix the Epoxy Resin: Follow the manufacturer’s instructions to mix the epoxy resin and hardener in a well-ventilated area. Use a mixing tool to ensure a homogeneous mixture.
Apply the Epoxy: Using a putty knife or spatula, apply the epoxy resin into the crack. Press it in firmly to ensure it fills the crack completely.
Smooth the Epoxy: Use a damp cloth to smooth out the epoxy and remove any excess. Be careful not to overwork it, as this can weaken the material.
Cure the Epoxy: Allow the epoxy to cure fully. This can take anywhere from 24 to 48 hours, depending on the resin type.
Sand the Area: Once cured, use a fine-grit sandpaper to smooth the surface. Sand lightly to blend the repaired area with the surrounding countertop.
Polish the Surface: Use polishing pads and compounds to restore the shine and smoothness of the countertop. Start with a coarse compound and gradually move to finer compounds until the surface is smooth.
Repairing Stress Cracks
Stress cracks can be particularly challenging due to their hidden nature. Here’s how to address them:
Identify Stress Cracks: Use a dye or UV light to identify stress cracks that are not immediately visible.
Cut Out the Damaged Area: Using a diamond tool, carefully cut out the damaged area around the crack. Ensure you remove enough material to prevent the crack from spreading.
Repair the Area: Follow the same steps for repairing deeper cracks with epoxy resin.
Re-polish the Surface: Once the repair is cured, use polishing pads and compounds to blend the repaired area with the rest of the countertop.
Final Touches and Maintenance
After repairing your artificial stone countertop, it’s important to take steps to maintain its beauty and integrity:
Regular Cleaning: Clean your countertop regularly with a mild detergent and water. Avoid using abrasive cleaners or sponges that can scratch the surface.
Avoiding Sharp Objects: Be cautious with sharp objects on the countertop to prevent new cracks from forming.
Prompt Repairs: Address any new cracks or damage promptly to prevent them from worsening.
Conclusion
Repairing cracks in artificial stone countertops is a manageable task with the right approach and materials. By following the techniques outlined in this guide, you can restore your countertop to its original condition and ensure its longevity. Remember to take your time and follow each step carefully for the best results. For a detailed video demonstration, stay tuned to our channel. Happy repairing!
Final Notes
This comprehensive guide covers the essential steps for repairing cracks in artificial stone countertops. Whether you’re a DIY enthusiast or a professional, these techniques will help you achieve a professional finish and extend the life of your countertop. For visual learners, we recommend watching our accompanying video for a step-by-step demonstration. Don’t forget to subscribe for more detailed guides and tips on home improvement and renovation projects.