Identifying Your Countertop Material and Initial Repairs
When a kitchen countertop develops a crack, the first step is to identify the type of material it is made from. Different materials require different repair methods, and understanding this will help you choose the best approach to fix the crack. Here’s a detailed guide on how to identify your countertop material and what initial steps you can take to repair it.

Identifying Your Countertop Material
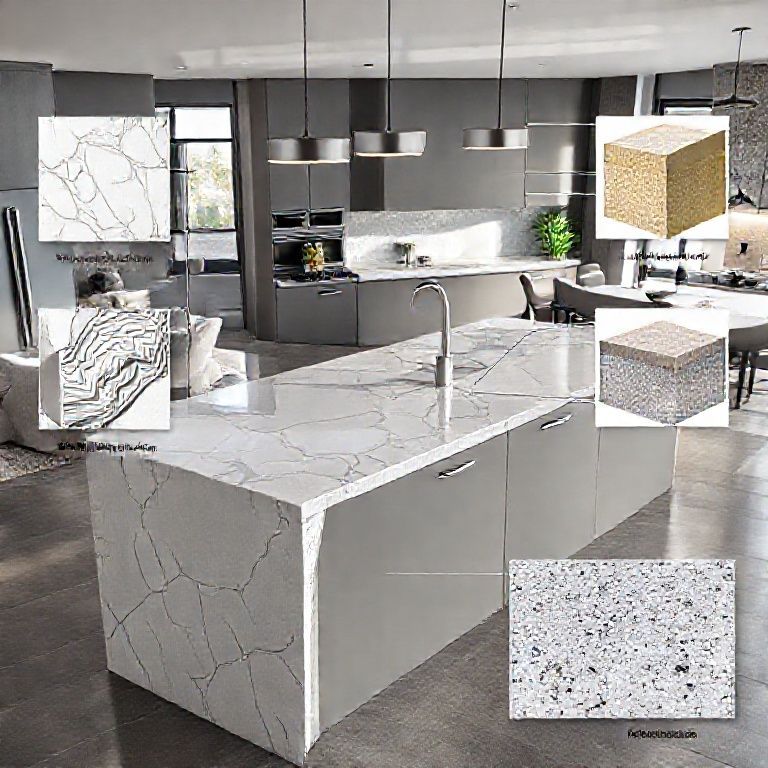
1. Granite: Granite countertops are known for their durability and aesthetic appeal, but they can still develop cracks over time, especially if something heavy is dropped on them. To identify granite, look for a smooth, polished surface that has a unique stone texture.
2. Quartz: Quartz is a composite material made from 90% quartz particles and 10% resin. It is highly durable and scratch-resistant. Quartz countertops have a sleek, modern look and are relatively easy to repair. You can often identify quartz by its seamless appearance and uniformity in color and texture.
3. Marble: Marble countertops are prized for their beauty and elegance, but they are also more prone to cracking and staining. Marble has a distinctive veined pattern and a smooth, polished finish.
4. Concrete: Concrete countertops are gaining popularity for their unique look and durability. They have a rough, textured surface and can be colored in a variety of ways.
5. Laminate: Laminate countertops are made from multiple layers of paper and resin, bonded together under heat and pressure. They have a smooth, easy-to-clean surface and come in a variety of colors and patterns.
Initial Repair Steps
Once you have identified your countertop material, the next step is to take some initial actions to prevent further damage and prepare for repair:

1. Clean the Area: Wipe down the cracked area with a clean, damp cloth to remove any dirt, grease, or debris. This will ensure that the repair material adheres properly.
2. Assess the Crack: Carefully examine the crack to determine its size and depth. This will help you choose the appropriate repair method.
3. Prevent Further Damage: If the crack is small, avoid using the countertop for heavy tasks until you have a chance to repair it properly. For larger cracks, consider placing a protective barrier like a silicone mat or a piece of plastic to prevent food or liquids from seeping into the crack.

4. Document the Damage: Take photos of the crack from different angles. This will help you track the progress of the repair and also serve as a reference if you need to order specific repair materials.
Choosing the Right Repair Method
Depending on the material and the severity of the crack, different repair methods are available:
1. For Granite and Quartz:
Epoxy Resin: Epoxy resin is a popular choice for repairing cracks in granite and quartz. It is strong, durable, and can be matched to the color of the countertop. Here’s a simple step-by-step guide:
Step 1: Clean the Crack: Clean the area around the crack thoroughly.
Step 2: Mix the Resin: Follow the manufacturer’s instructions to mix the epoxy resin. Typically, you will need to combine two components: the resin and the hardener.
Step 3: Apply the Resin: Use a putty knife or a small brush to apply the resin into the crack. Press it in firmly to ensure it fills the crack completely.
Step 4: Smooth the Surface: Once the resin has been applied, use a damp cloth to smooth the surface and remove any excess resin.
Step 5: Cure the Resin: Allow the resin to cure as per the manufacturer’s instructions. This usually takes a few hours.
2. For Marble:
Crack Filler: Marble cracks can sometimes be repaired with a specialized crack filler. This is a putty-like substance that can be colored to match the marble.
Step 1: Clean the Crack: Thoroughly clean the crack.
Step 2: Apply the Filler: Using a small spatula or knife, apply the crack filler into the crack. Press it in firmly.
Step 3: Smooth the Surface: Use a damp cloth to smooth the surface and remove any excess filler.
Step 4: Cure the Filler: Allow the filler to cure completely, following the manufacturer’s instructions.
3. For Concrete:
Polyurethane Sealant: Concrete countertops can often be repaired with a polyurethane sealant. This is a flexible and durable material that can bond well with concrete.
Step 1: Clean the Crack: Clean the crack thoroughly.
Step 2: Mix the Sealant: Follow the manufacturer’s instructions to mix the polyurethane sealant.
Step 3: Apply the Sealant: Use a brush or a small spatula to apply the sealant into the crack. Ensure it fills the crack completely.
Step 4: Cure the Sealant: Allow the sealant to cure as per the manufacturer’s instructions.
4. For Laminate:
Laminate Repair Kits: Laminate countertops can be repaired using a laminate repair kit. These kits typically include a patch and adhesive.
Step 1: Clean the Crack: Clean the area around the crack.
Step 2: Apply the Patch: Follow the kit instructions to apply the patch over the crack.
Step 3: Apply the Adhesive: Apply the adhesive as directed and press the patch firmly in place.
Step 4: Cure the Adhesive: Allow the adhesive to cure completely, following the kit instructions.
Final Thoughts
Repairing a crack in your kitchen countertop is a task that can be accomplished with the right tools and knowledge. By identifying the material of your countertop and understanding the appropriate repair method, you can restore the beauty and functionality of your kitchen surface. Remember, prevention is always better than cure, so take care of your countertops regularly to avoid cracks and other damage. With these tips and techniques, you’ll be well-equipped to tackle any countertop crack that comes your way.
Advanced Repair Techniques and Long-Term Maintenance
Once you’ve addressed the initial steps of repairing a crack in your kitchen countertop, it’s time to explore more advanced techniques and strategies for ensuring long-term maintenance and durability. This part will delve into more intricate repair methods and provide tips on how to keep your countertop looking pristine for years to come.
Advanced Repair Techniques
1. For Large Cracks in Granite and Quartz:
Countertop Repair Kits: For larger cracks, using a countertop repair kit can provide a more robust solution. These kits often include high-strength epoxy resins, sanding tools, and polishing compounds.
Step 1: Prepare the Surface: Clean the area around the crack thoroughly. Sand the edges of the crack lightly to create a rough surface for better adhesion.
Step 2: Mix and Apply the Resin: Follow the manufacturer’s instructions to mix the epoxy resin. Apply it to the crack using a putty knife or a brush. Make sure it fills the crack completely.
Step 3: Smooth and Cure: Use a damp cloth to smooth the surface and remove any excess resin. Allow the resin to cure completely, which may take several hours.
Step 4: Sand and Polish: Once cured, lightly sand the area with fine-grit sandpaper to blend the repair with the surrounding surface. Finally, polish the area with a granite or quartz polish to restore the shine.
2. For Complex Cracks in Marble:
Marble Restoration: For intricate or large cracks in marble, professional marble restoration might be necessary. This process involves filling the crack with a marble filler, smoothing it out, and polishing the surface to match the surrounding marble.
Step 1: Clean the Crack: Thoroughly clean the crack area.
Step 2: Fill the Crack: Use a marble filler that can be colored to match the marble. Apply it to the crack and press it in firmly.
Step 3: Smooth the Surface: Use a damp cloth to smooth the surface and remove any excess filler.
Step 4: Polish the Marble: Once the filler has cured, polish the area with a marble polishing compound to restore the shine and texture.
3. For Wide Cracks in Concrete:
Polyurethane Injection: For wide or deep cracks in concrete countertops, polyurethane injection is an effective method. This technique involves injecting a polyurethane resin into the crack to fill it and provide structural support.
Step 1: Clean the Crack: Clean the crack thoroughly and remove any loose debris.
Step 2: Apply the Sealant: Apply a polyurethane sealant to the edges of the crack to create a barrier.
Step 3: Inject the Resin: Use a syringe or a specialized injection tool to inject the polyurethane resin into the crack. Ensure it fills the crack completely.
Step 4: Cure and Smooth: AllowStep 4: Cure and Smooth: Allow the resin to cure completely, which may take several hours. Once cured, sand the area lightly to blend the repair with the surrounding surface. Finish with a concrete polish to restore the texture and appearance.
4. For Large Cracks in Laminate:
Laminate Patching: For larger or more visible cracks in laminate countertops, a laminate patch can provide a seamless repair. These patches are made to match the color and texture of the countertop.
Step 1: Prepare the Area: Clean the crack area thoroughly and sand the edges lightly to create a rough surface for better adhesion.
Step 2: Apply the Patch: Follow the manufacturer’s instructions to apply the laminate patch over the crack. Use a laminate adhesive to secure the patch in place.
Step 3: Cure and Smooth: Allow the adhesive to cure completely. Once cured, use a laminate polish or a cloth to smooth and blend the patch with the surrounding surface.
Long-Term Maintenance
1. Regular Cleaning: Maintaining a clean countertop is essential to prevent cracks from forming in the first place. Use mild dish soap and water to clean the surface regularly. Avoid using abrasive cleaners or sharp objects that can scratch or chip the countertop.
2. Proper Cooking Techniques: When cooking, use trivets or heat-resistant pads to protect the countertop from direct heat. This prevents thermal shock, which can cause cracks. Always allow hot items to cool slightly before placing them on the countertop.
3. Immediate Repair: If you notice any small cracks or chips, address them promptly. Small cracks can quickly become larger if left untreated. Use the appropriate repair method for your countertop material to fix these minor issues before they worsen.
4. Protective Barriers: Consider placing protective barriers, such as silicone mats or trivets, under frequently used cooking equipment and hot pots and pans. This can prevent direct heat and pressure from damaging the countertop.
5. Regular Inspection: Periodically inspect your countertop for any signs of wear, scratches, or small cracks. Early detection and repair can save you from more extensive damage and costly repairs in the future.
6. Professional Maintenance: For certain countertop materials, like marble and high-end granite, periodic professional maintenance can help keep them looking their best. This might include sealing the surface or re-polishing to maintain shine and protect against stains and scratches.
Conclusion
Repairing a crack in your kitchen countertop doesn’t have to be a daunting task. By identifying the type of material your countertop is made from and understanding the appropriate repair methods, you can effectively restore its beauty and functionality. Additionally, implementing long-term maintenance strategies will help prevent future damage and ensure your countertop remains a stunning feature in your kitchen for years to come. With these tips and techniques, you’ll be well-equipped to handle any countertop crack that comes your way, keeping your kitchen looking pristine and professional.